
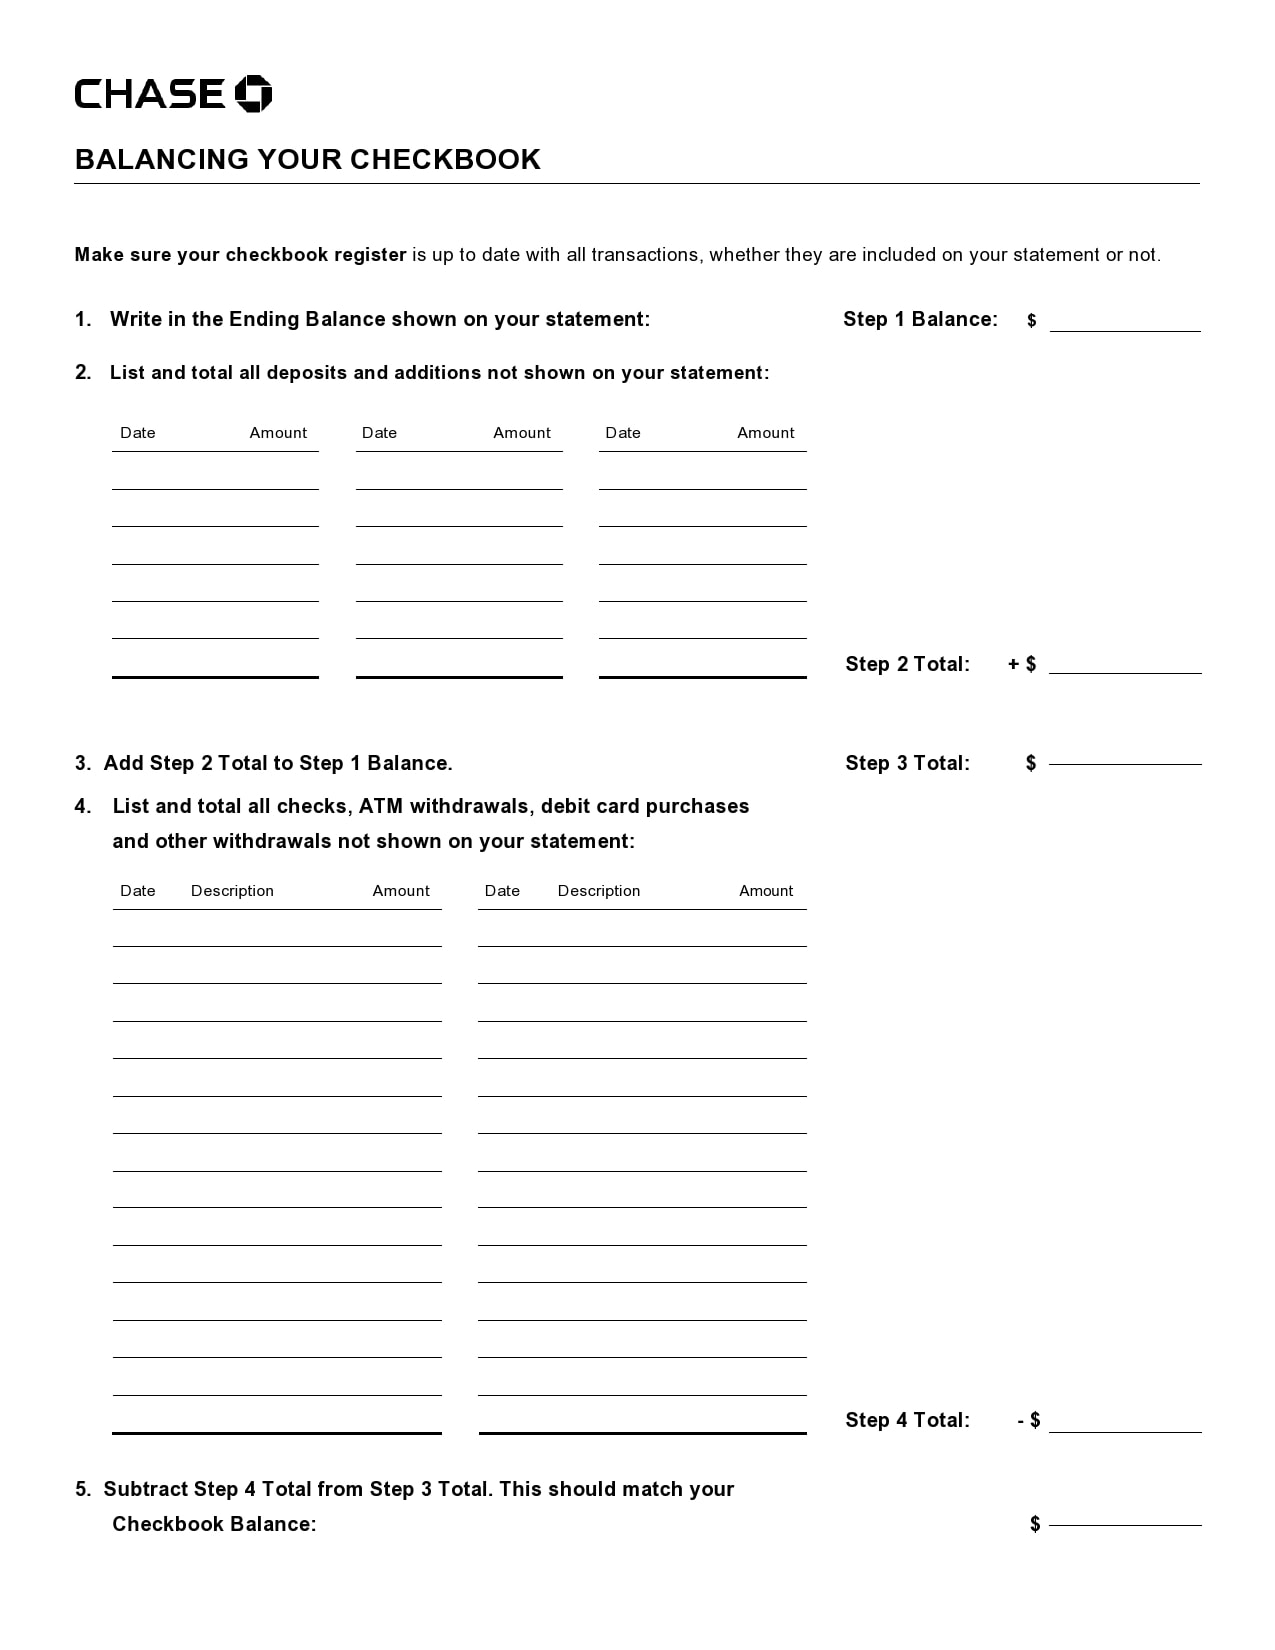
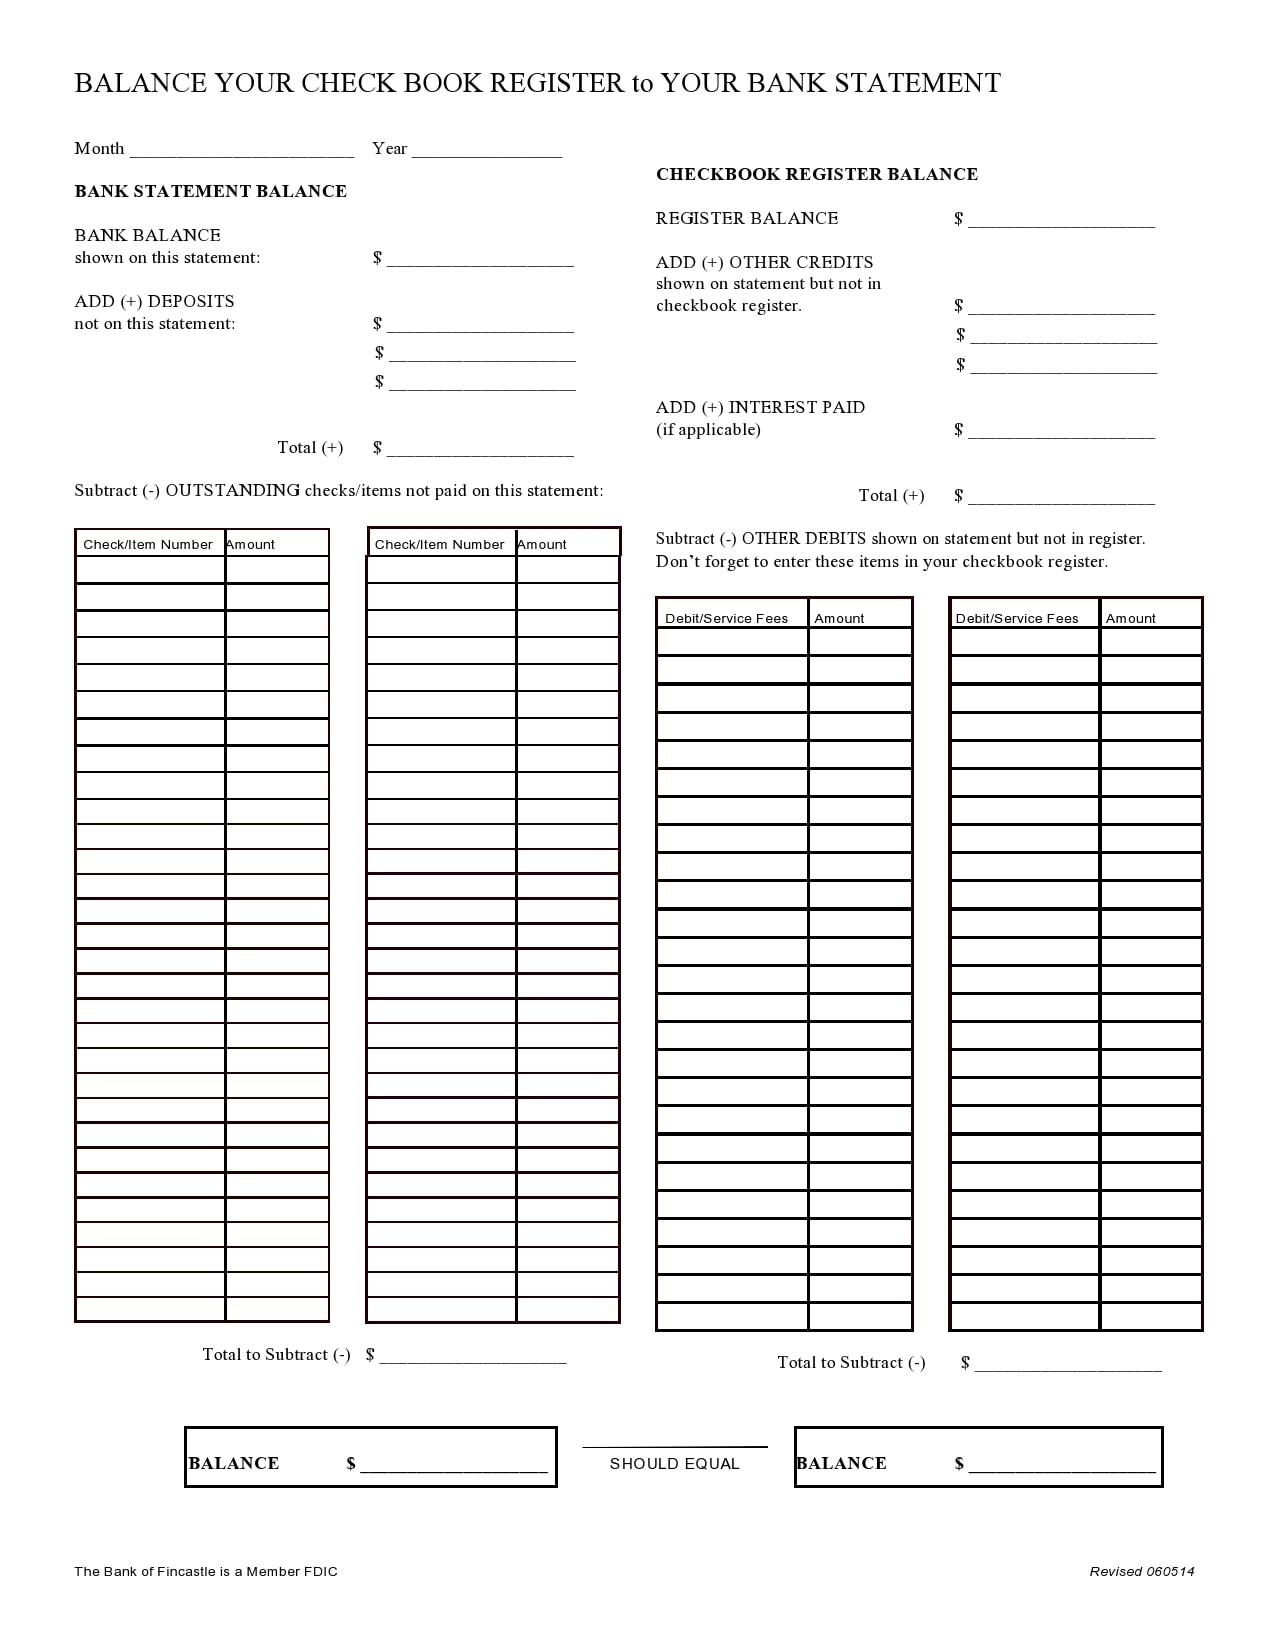
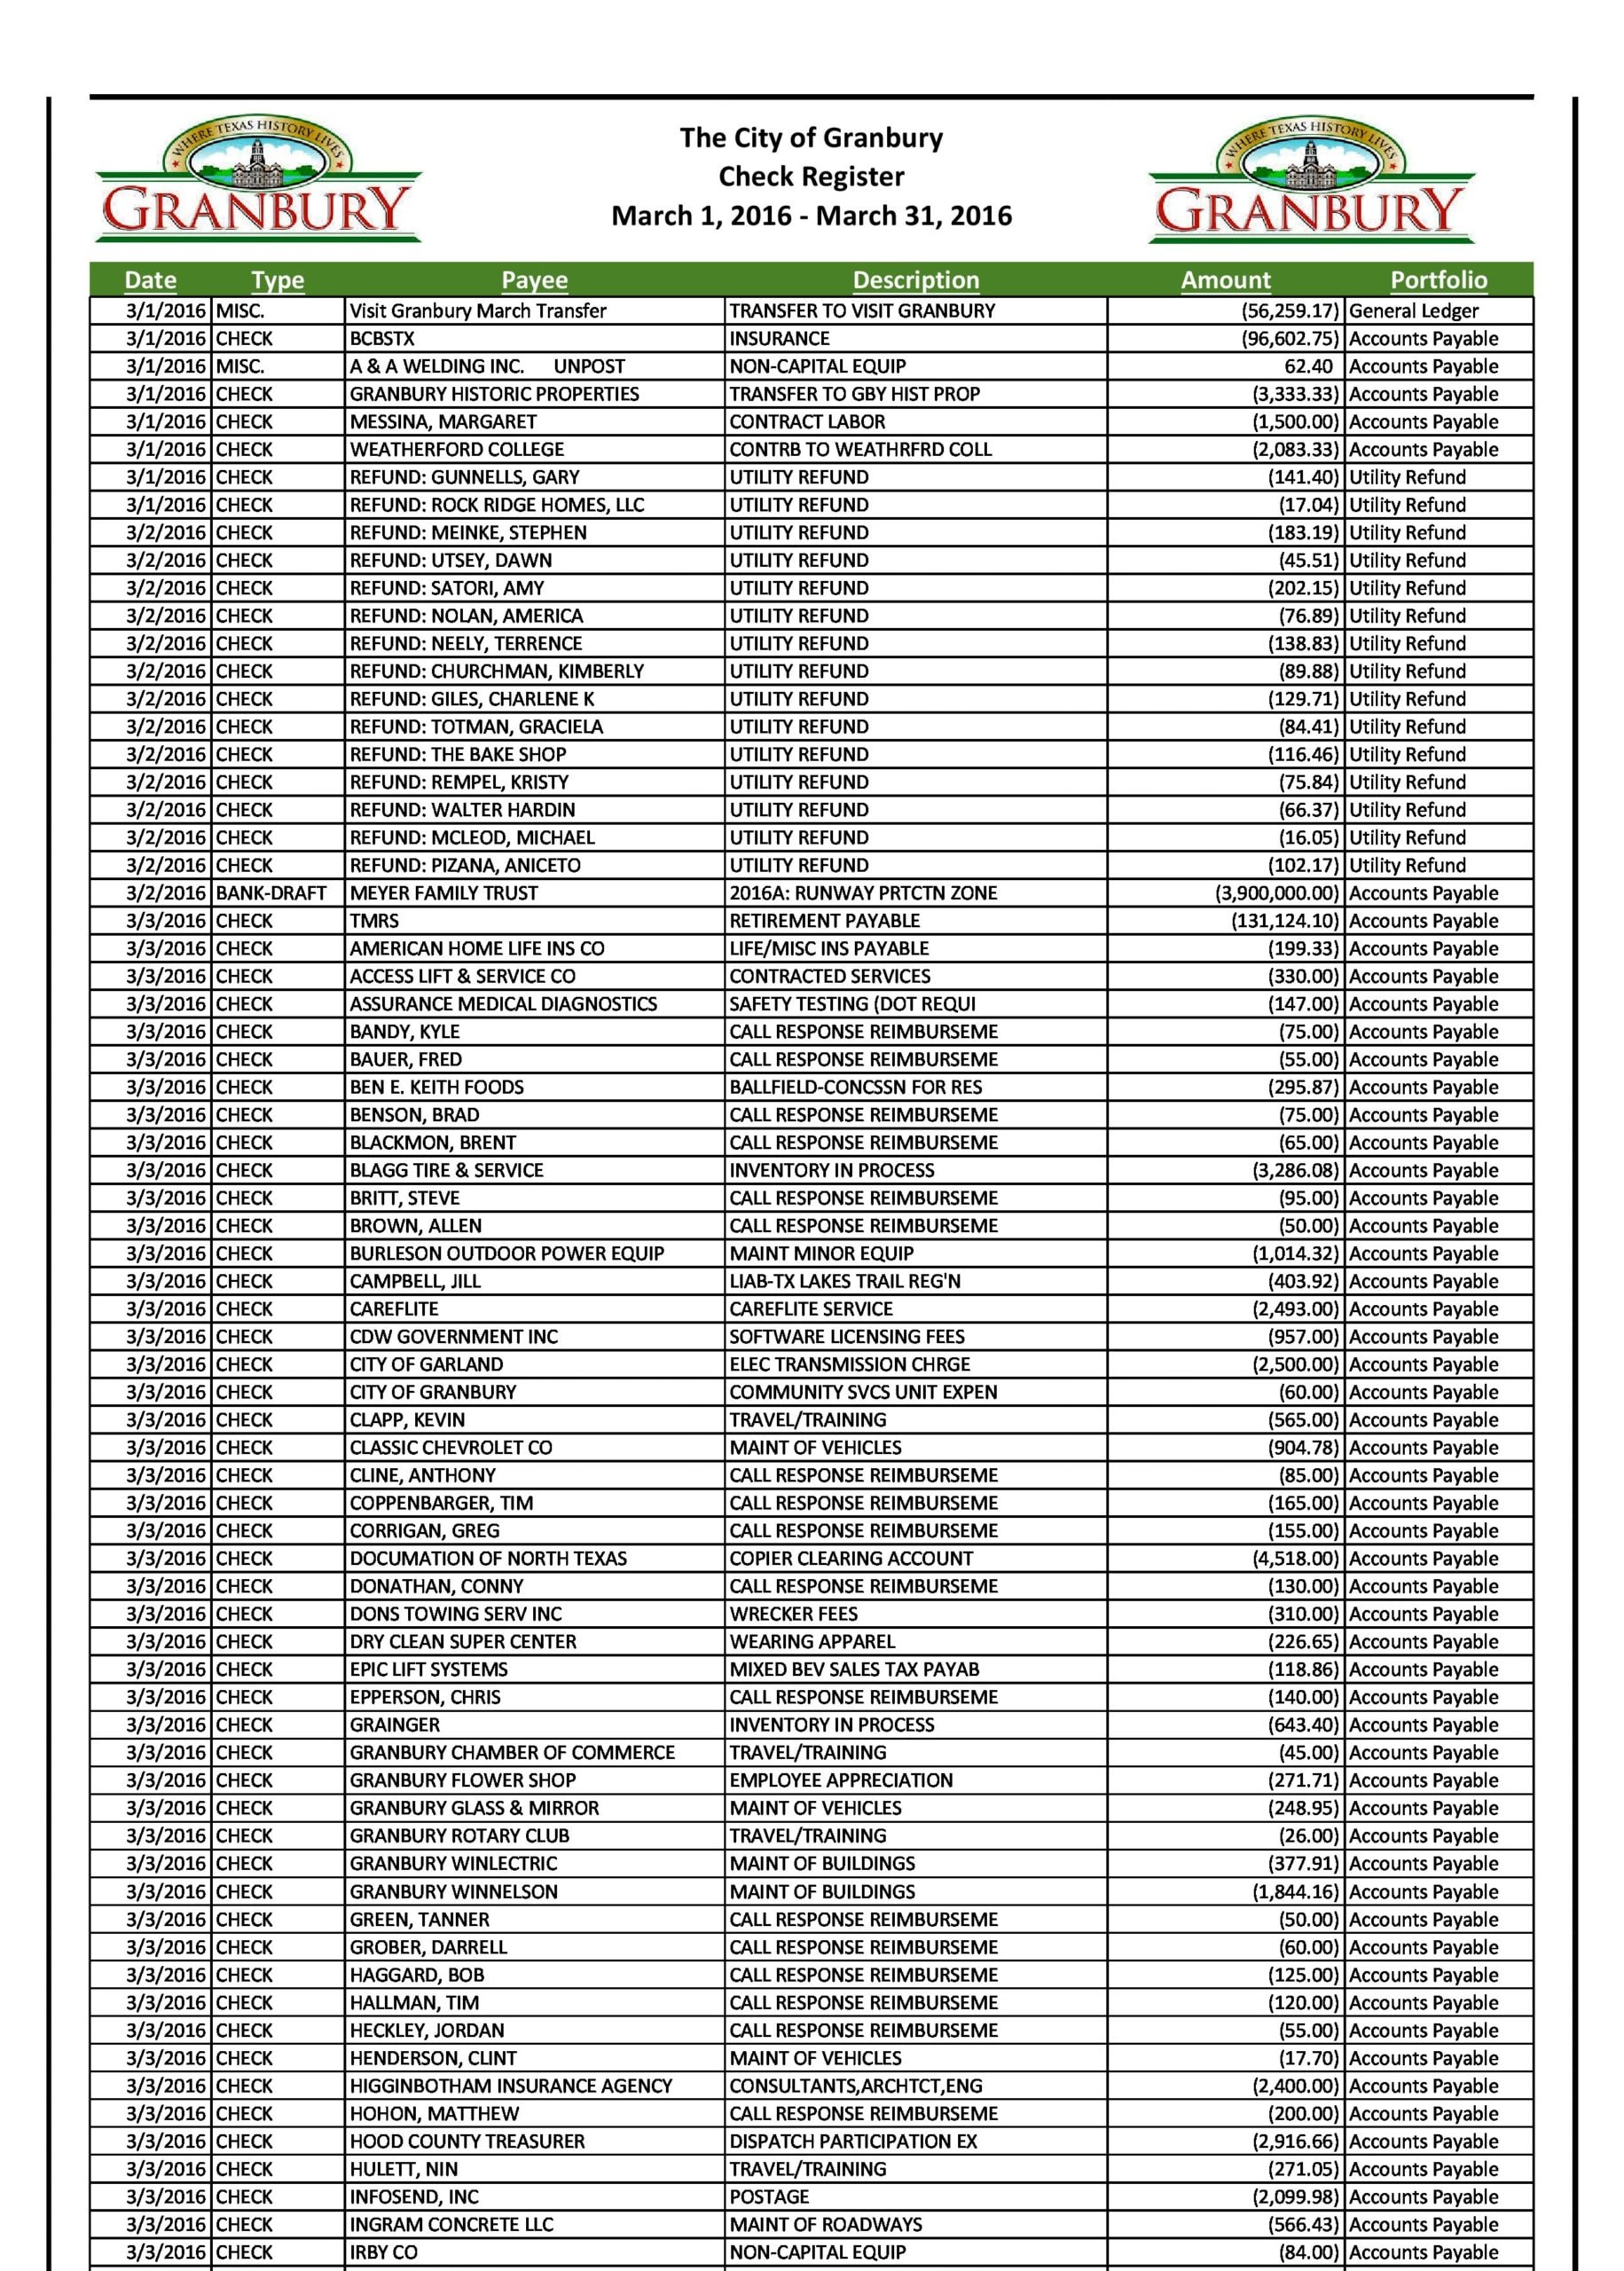
Keeping track of checks that you have issued is very important, especially if you’re running a business or managing your personal finances. Knowing how much you have spent and how much remains in your account helps you make adjustments as needed. To make tracking easier, you need a check register template.
Contents
Check Register Templates


What is a check register template?
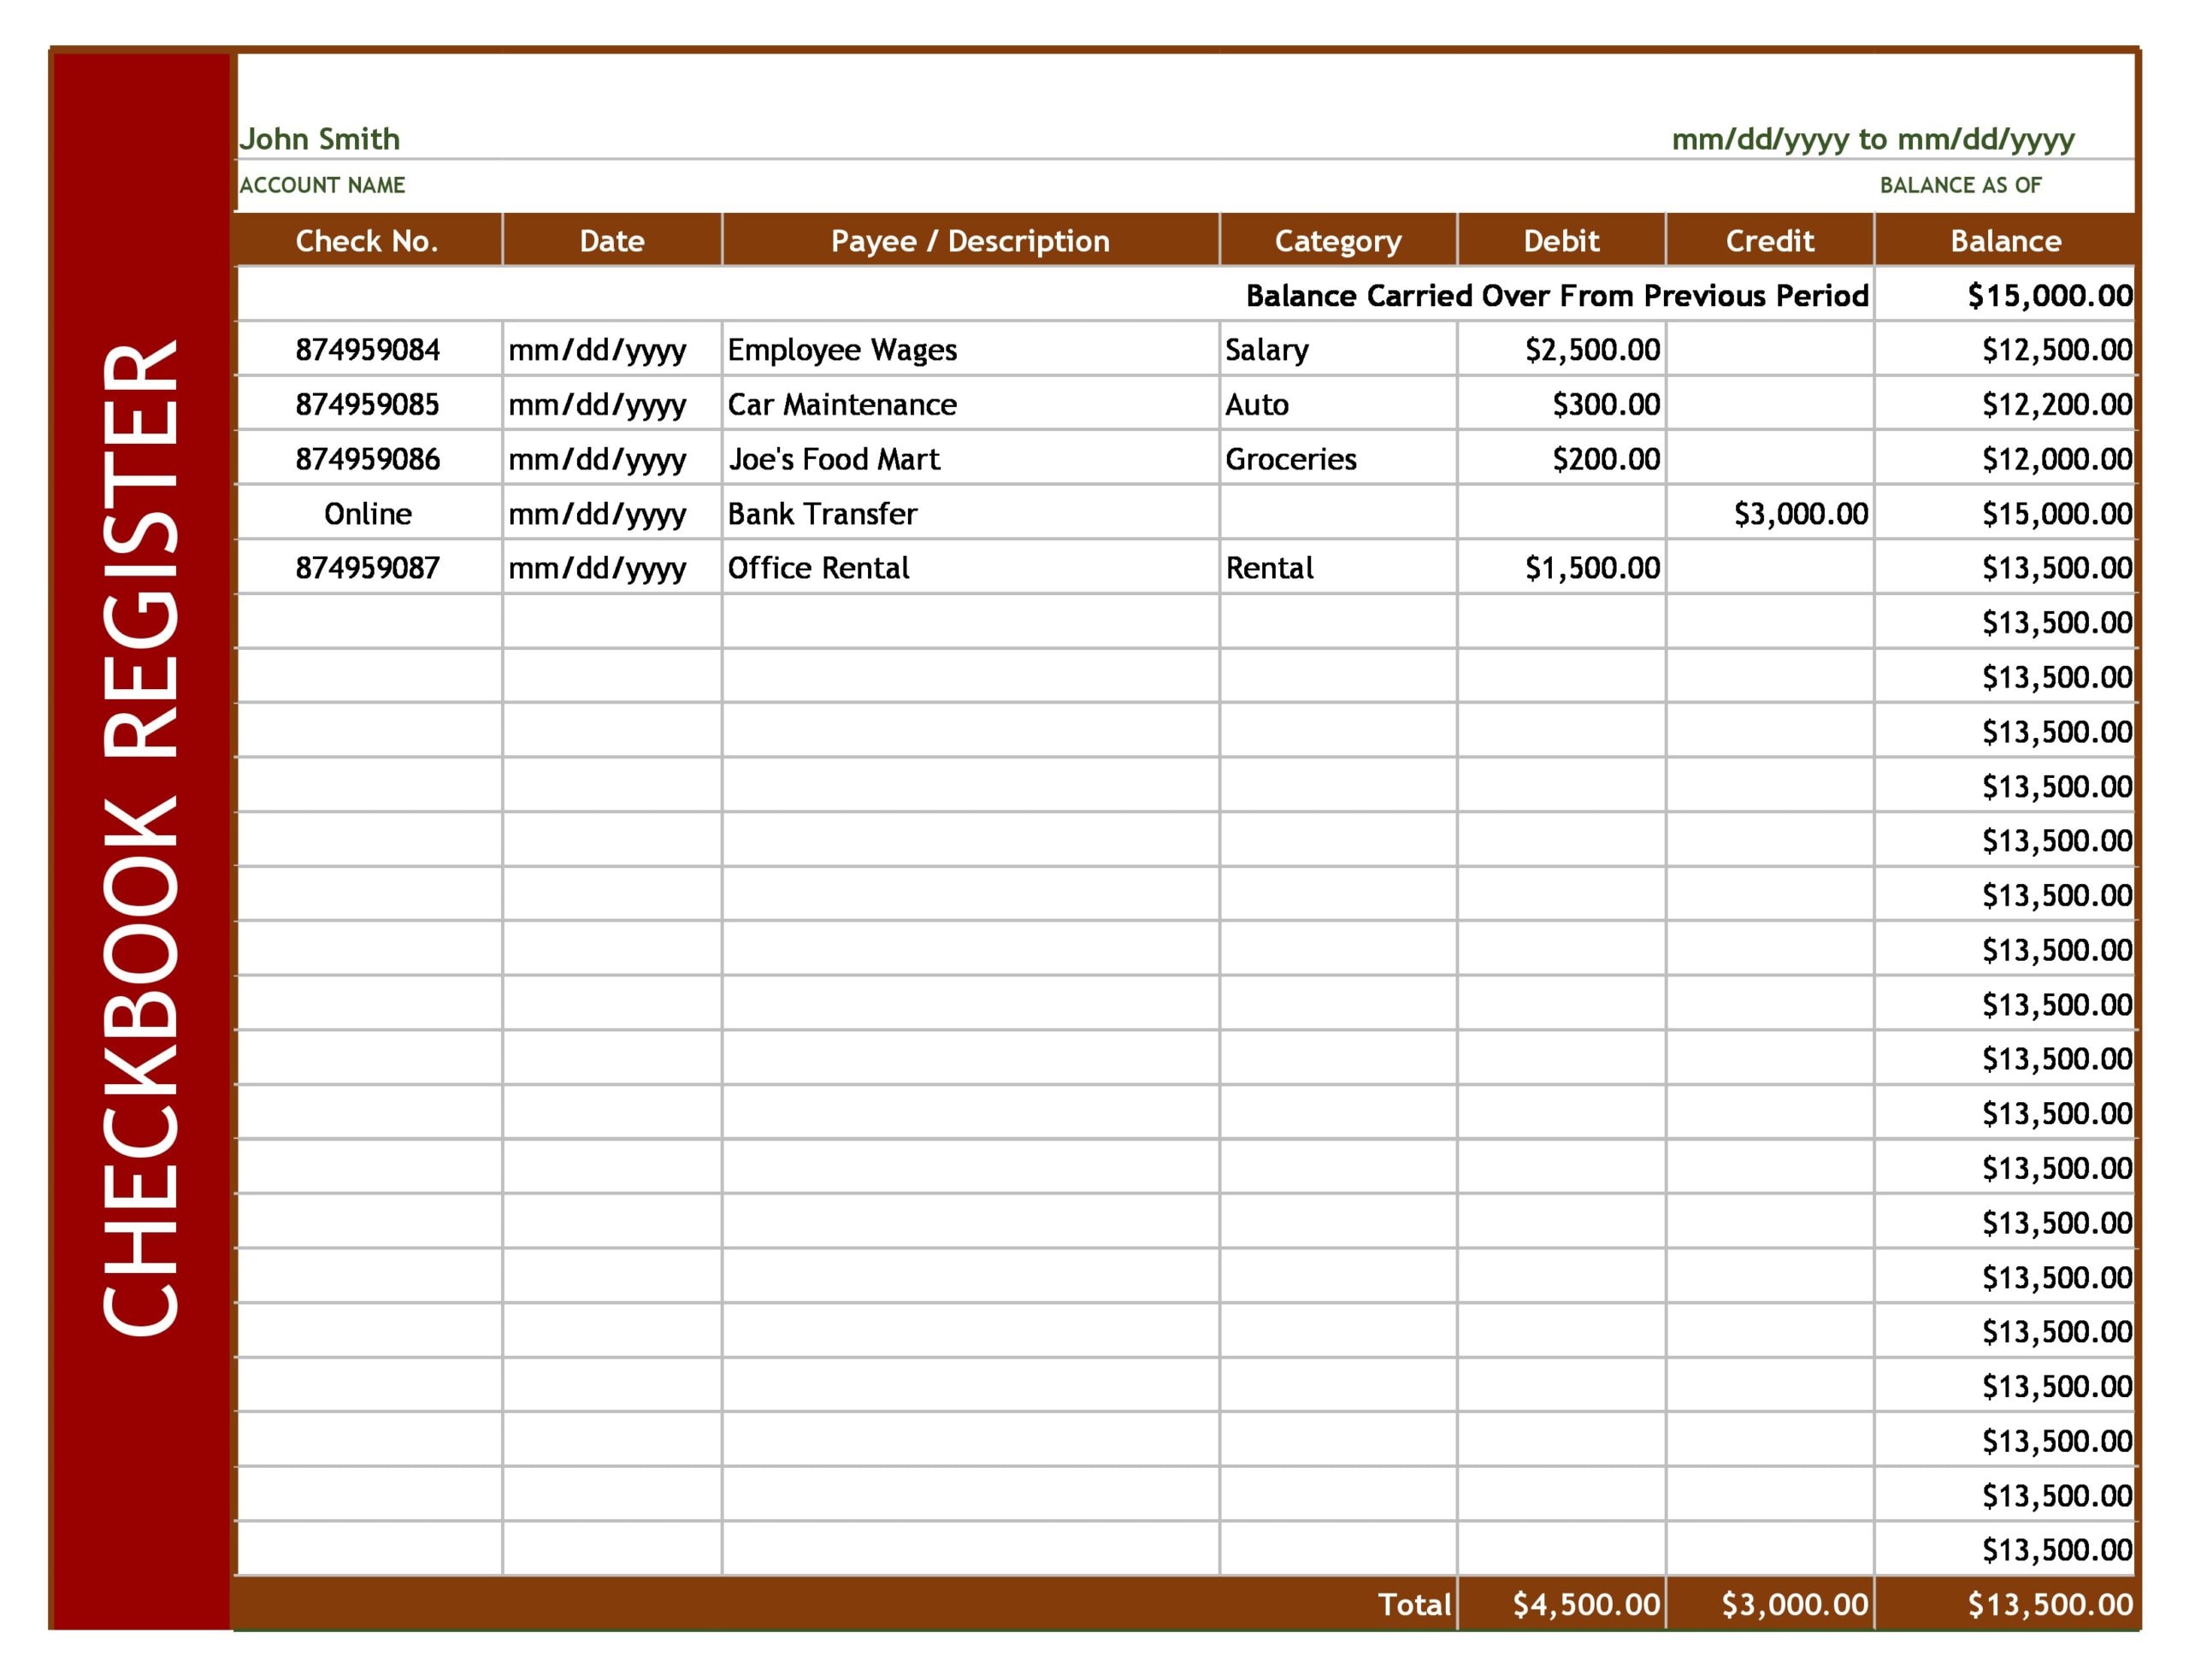
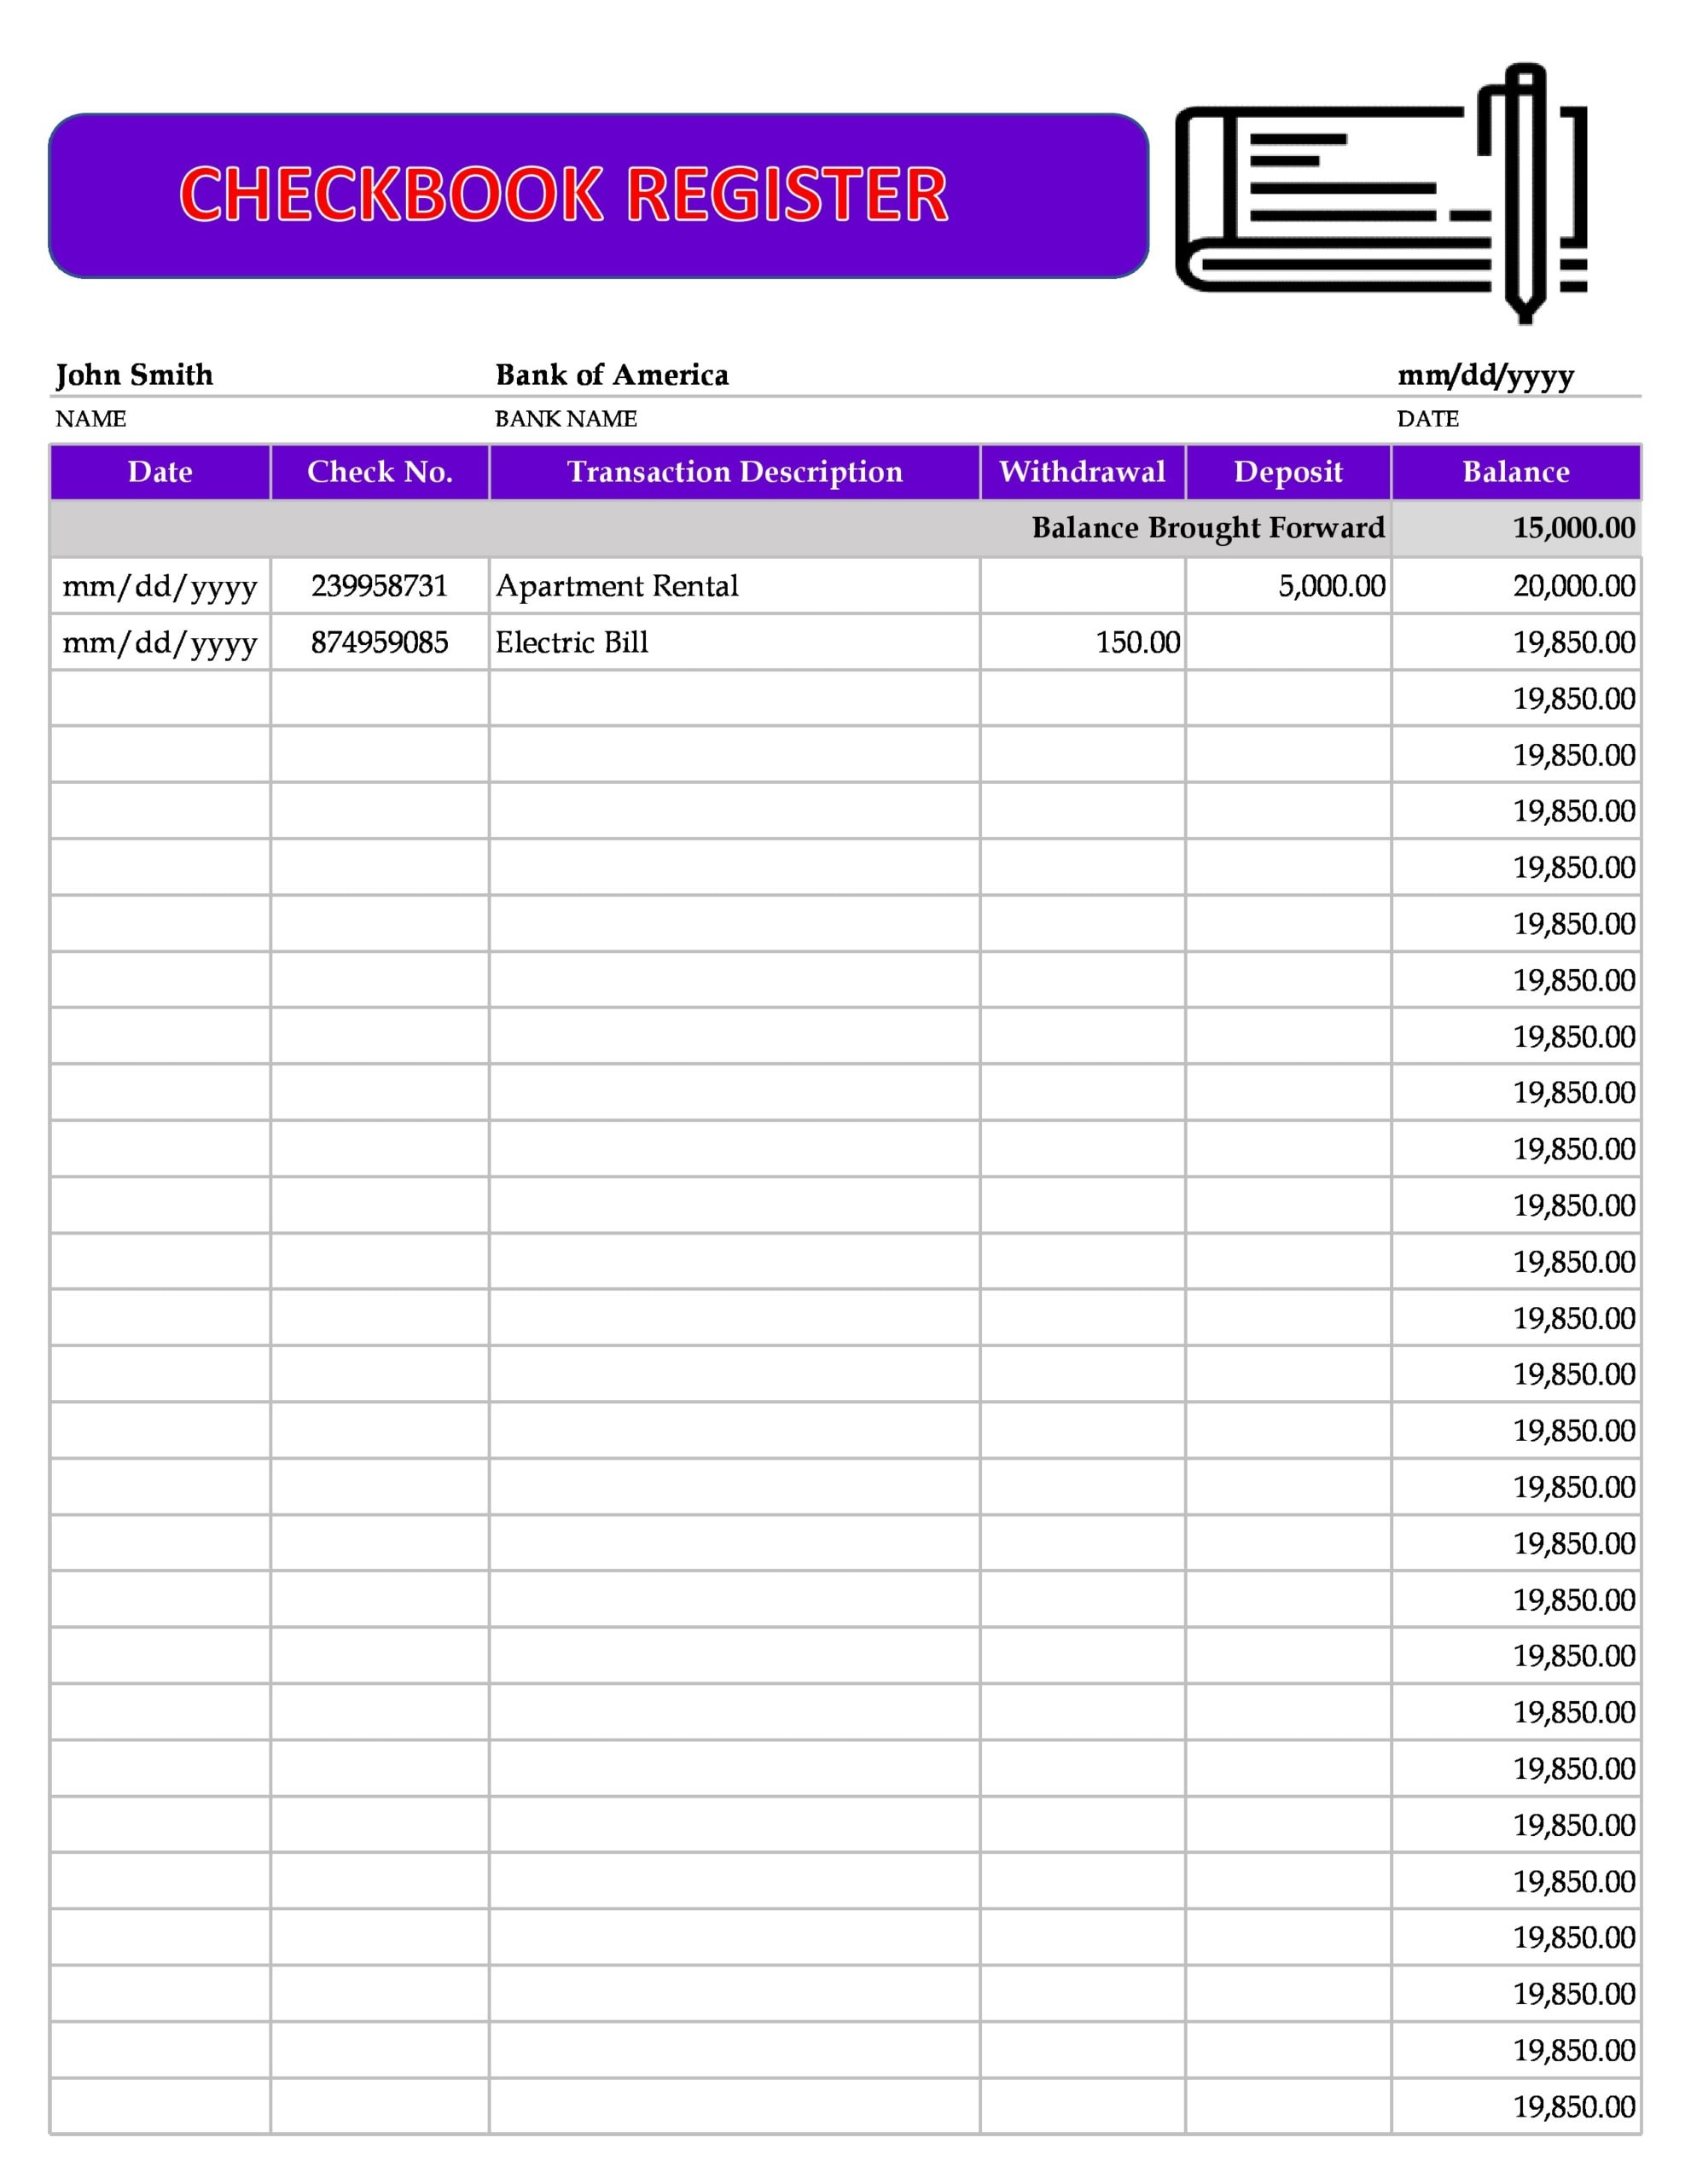
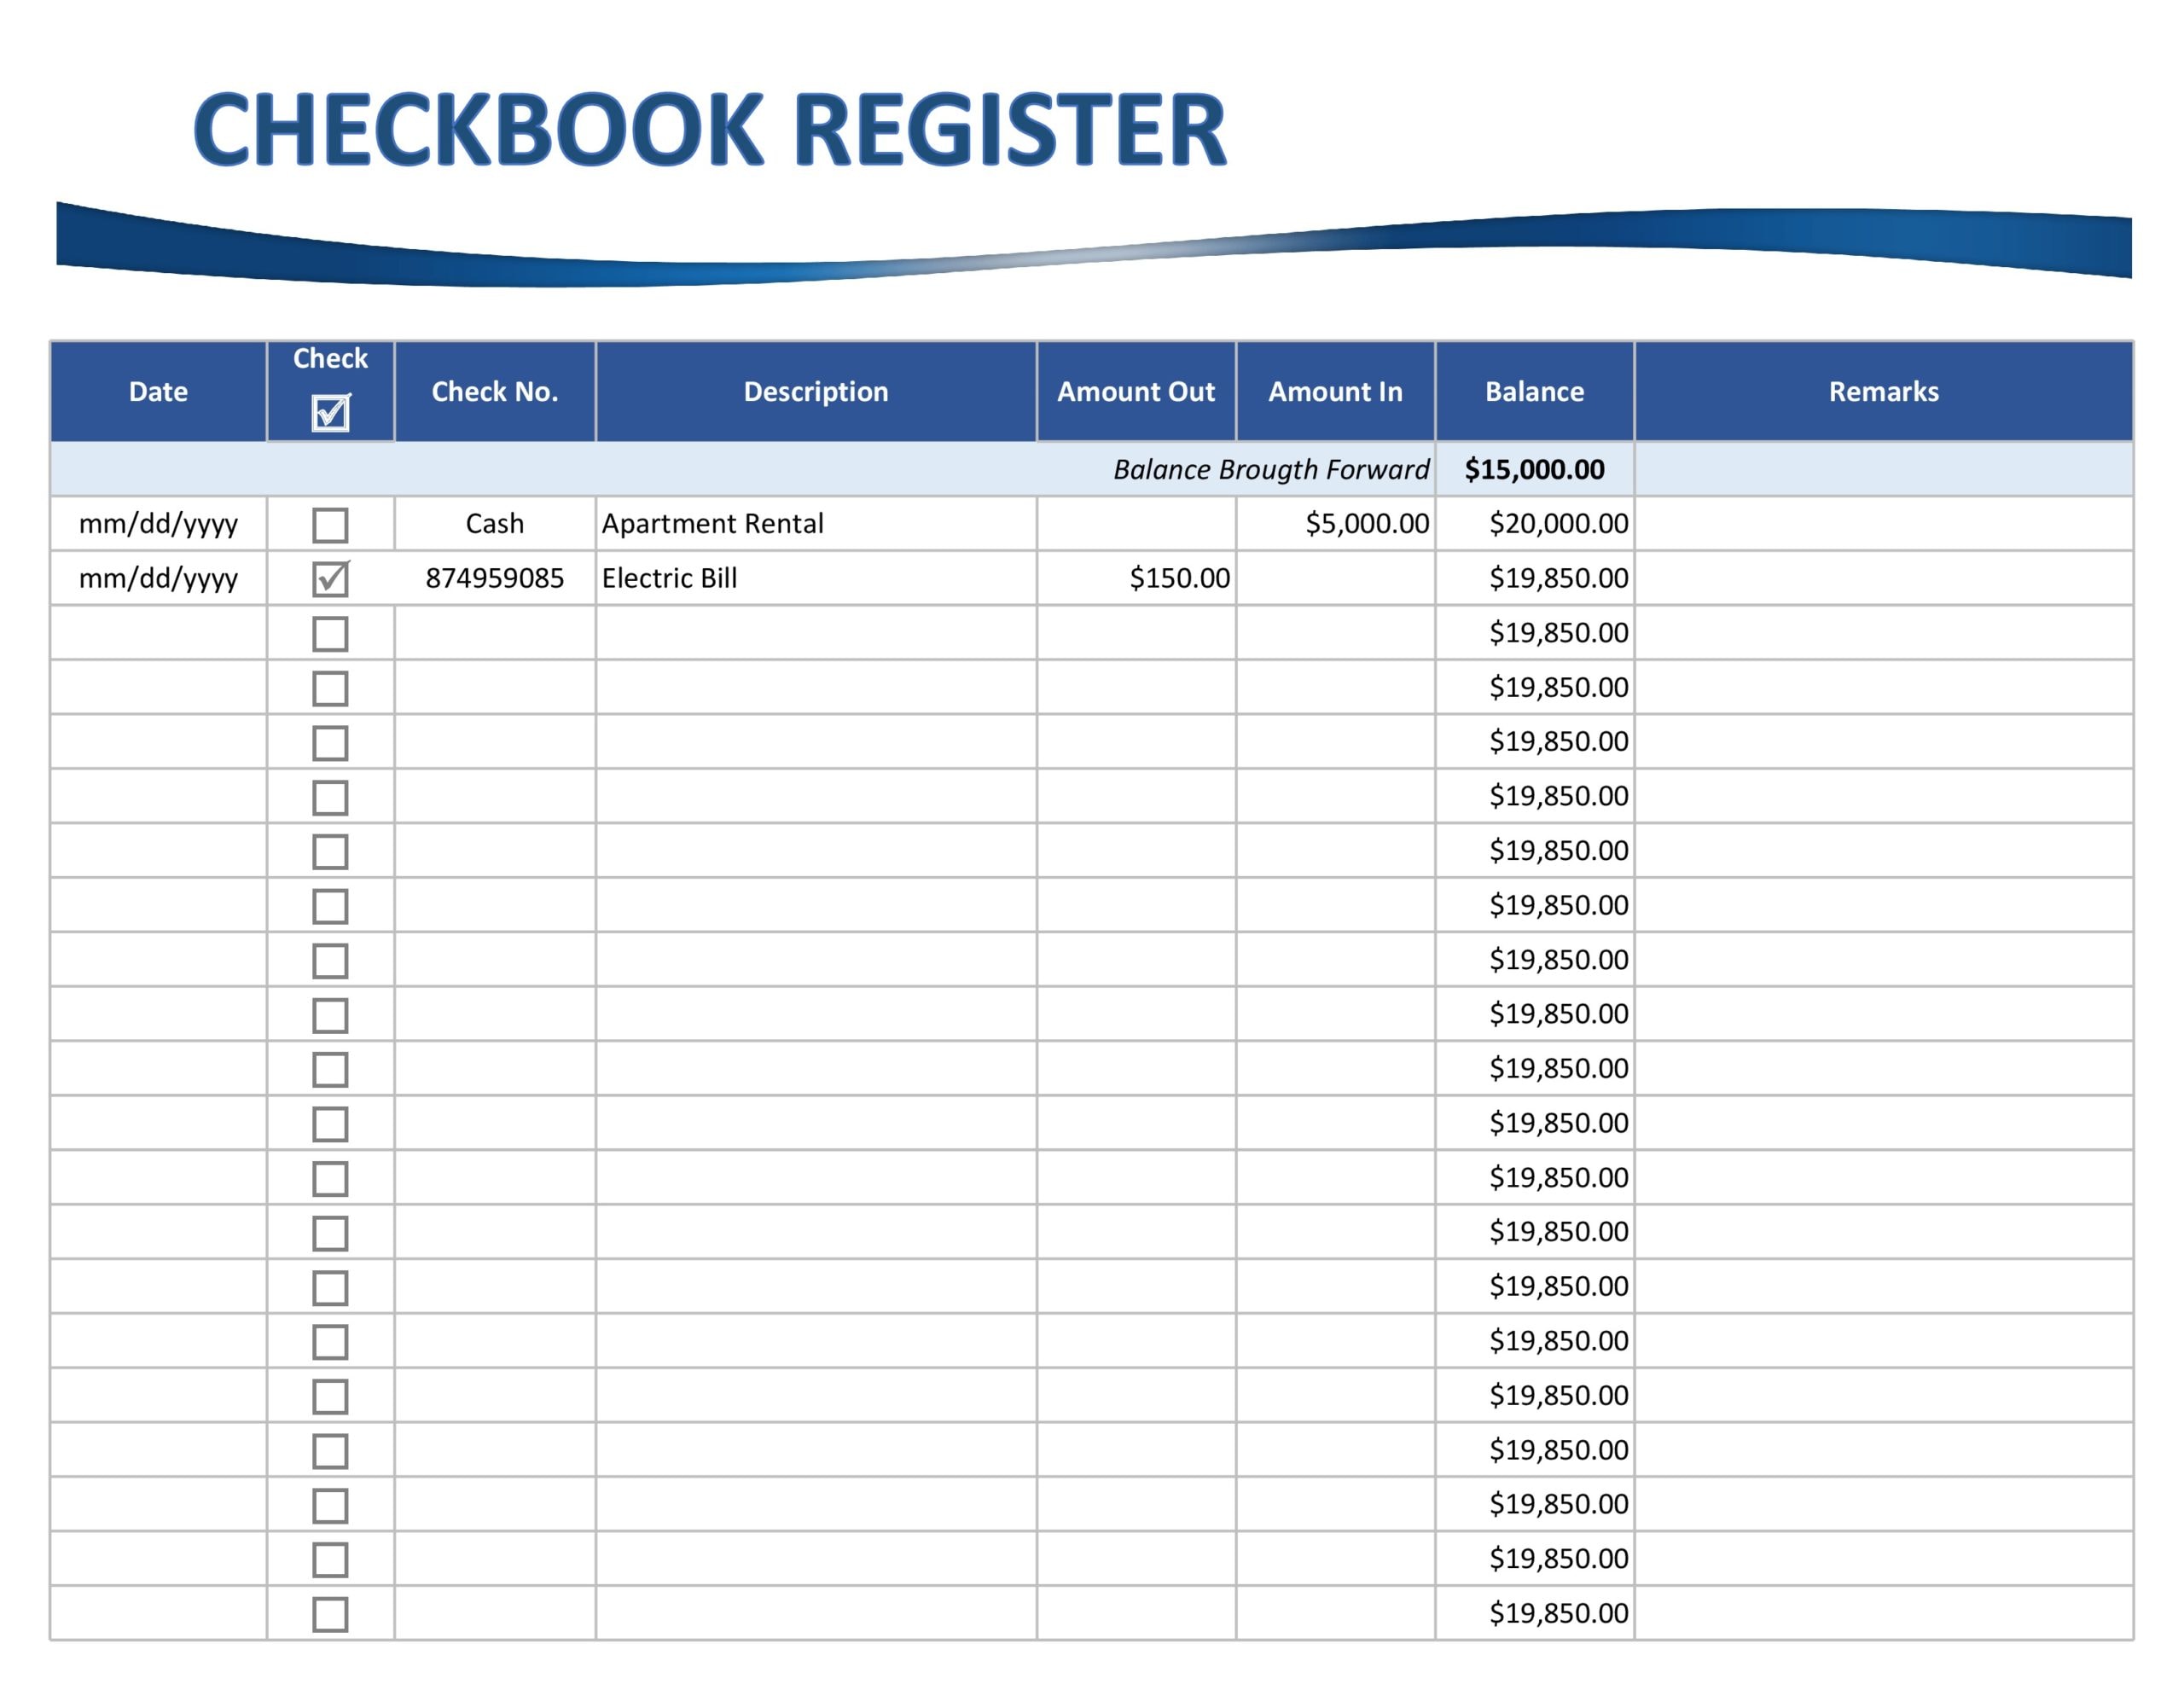
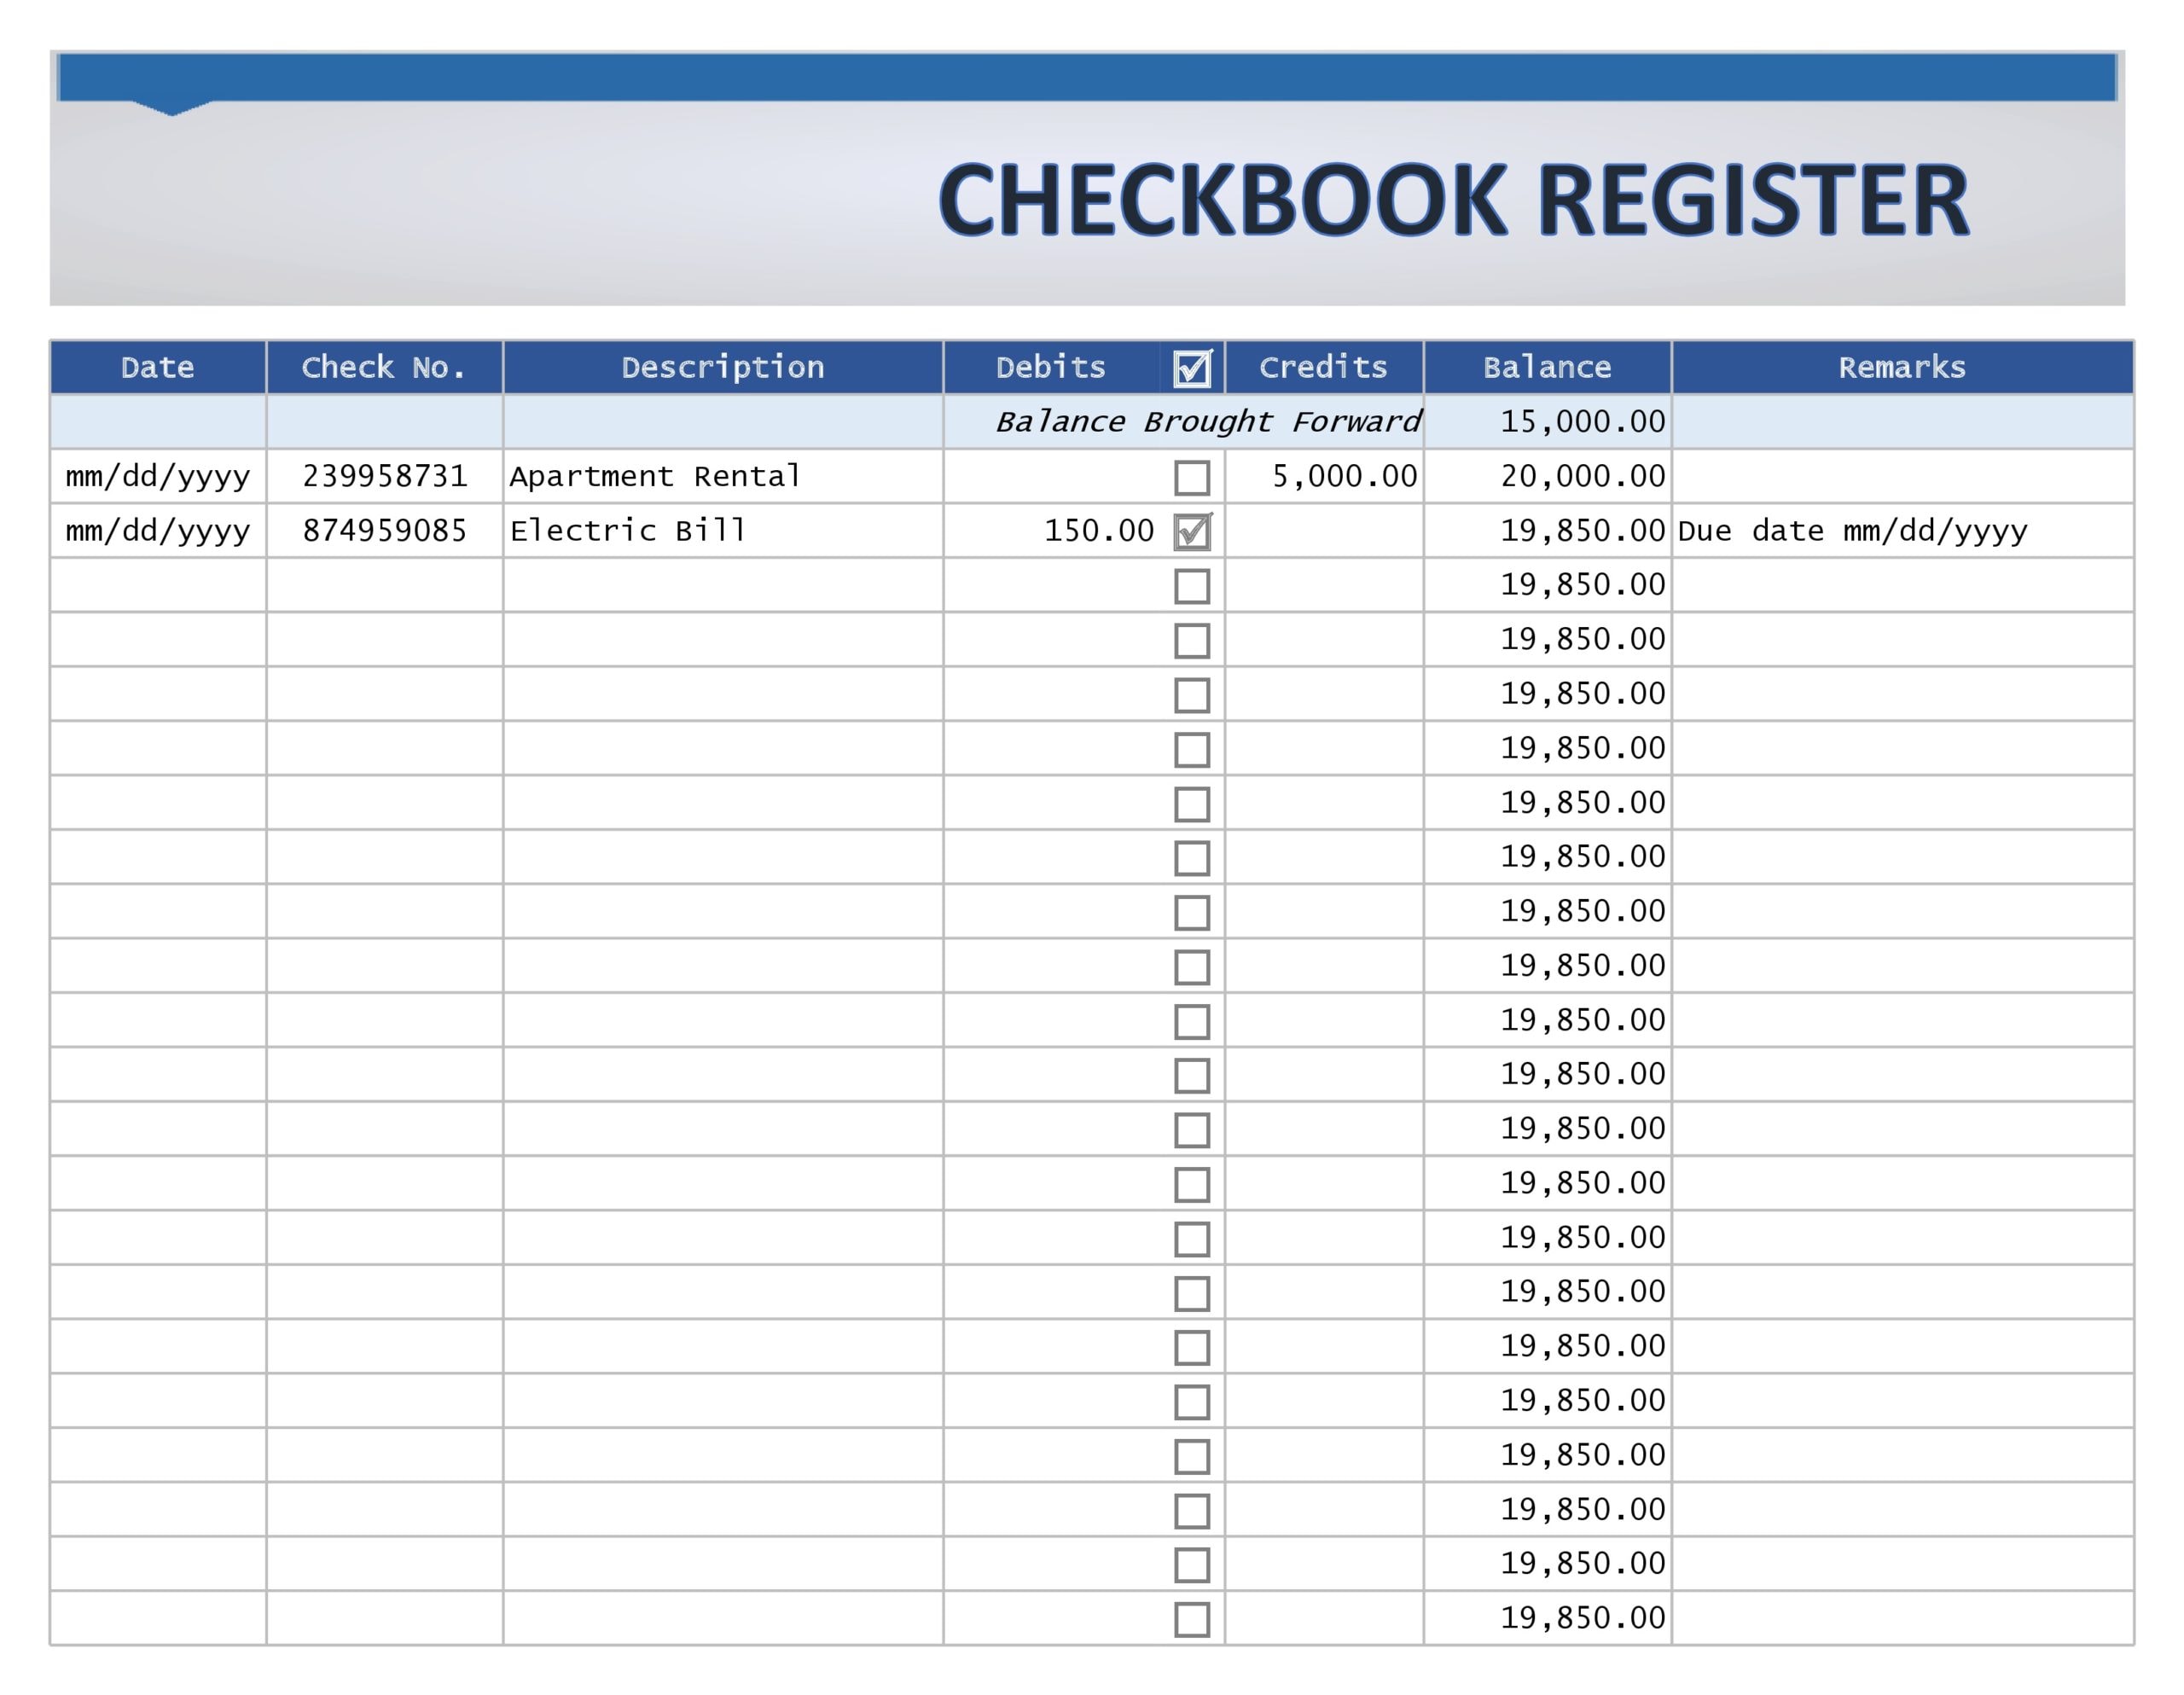
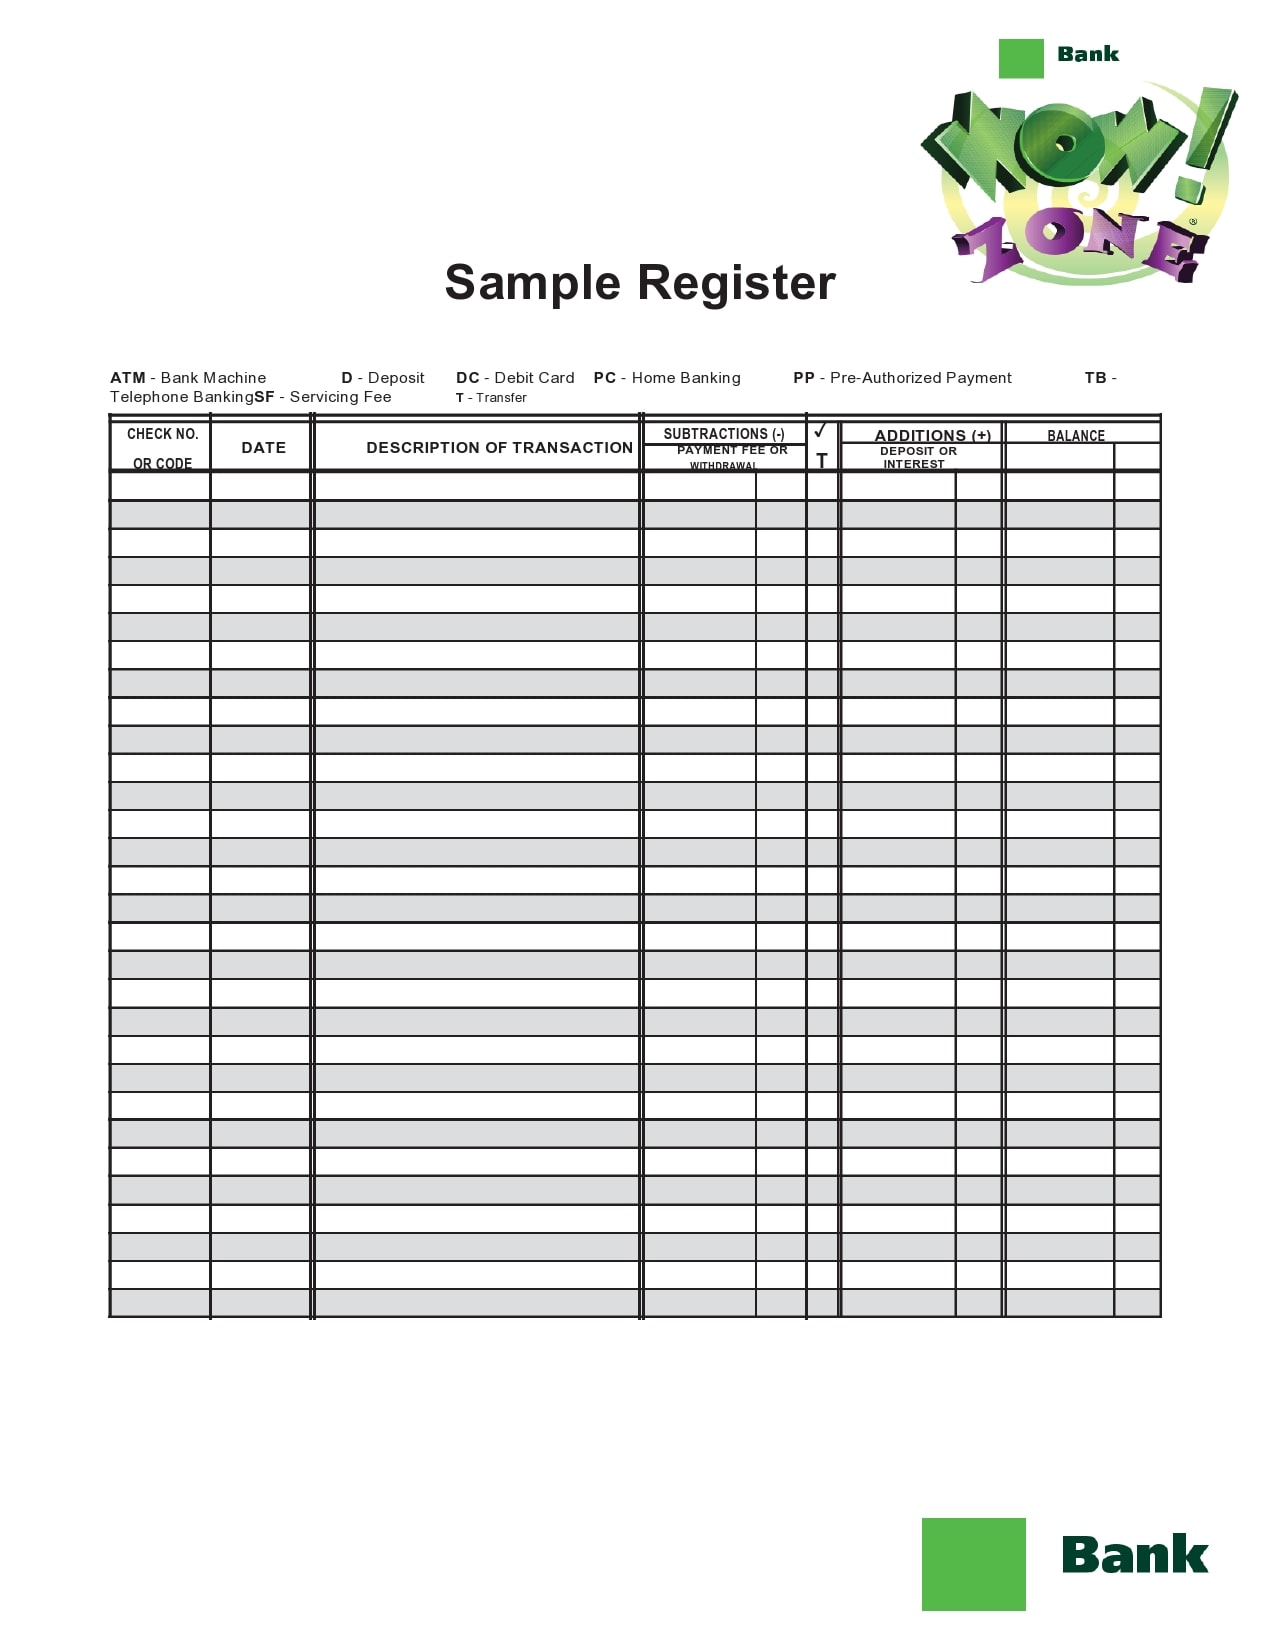
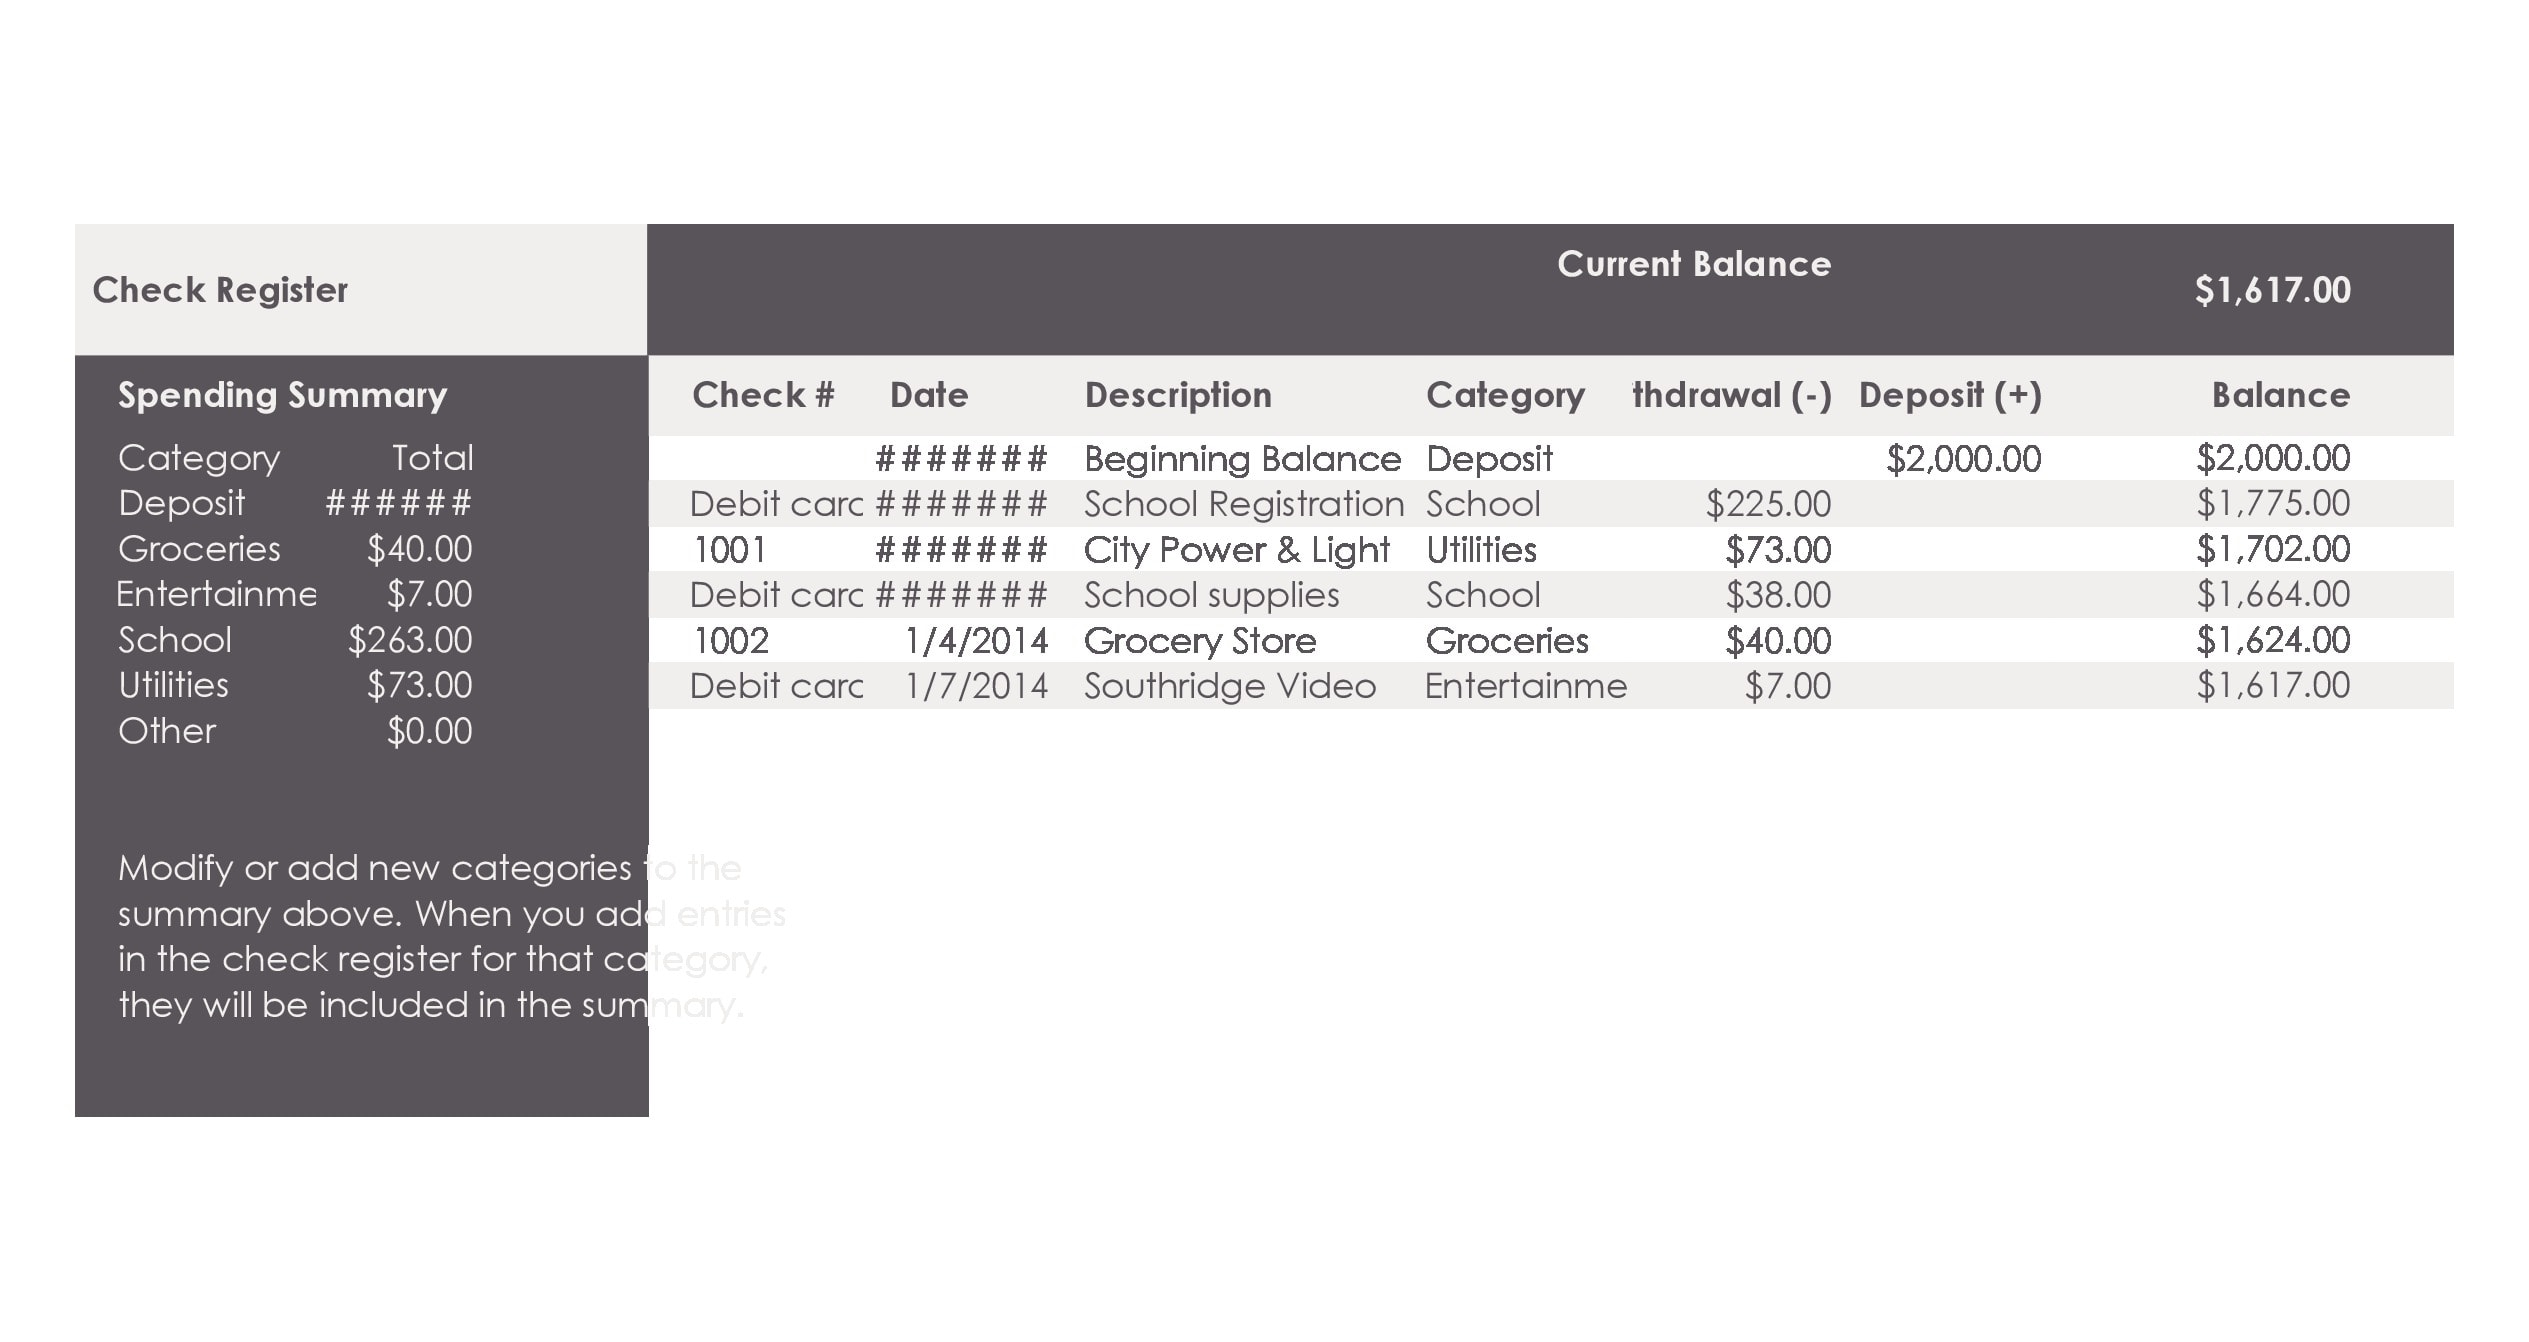
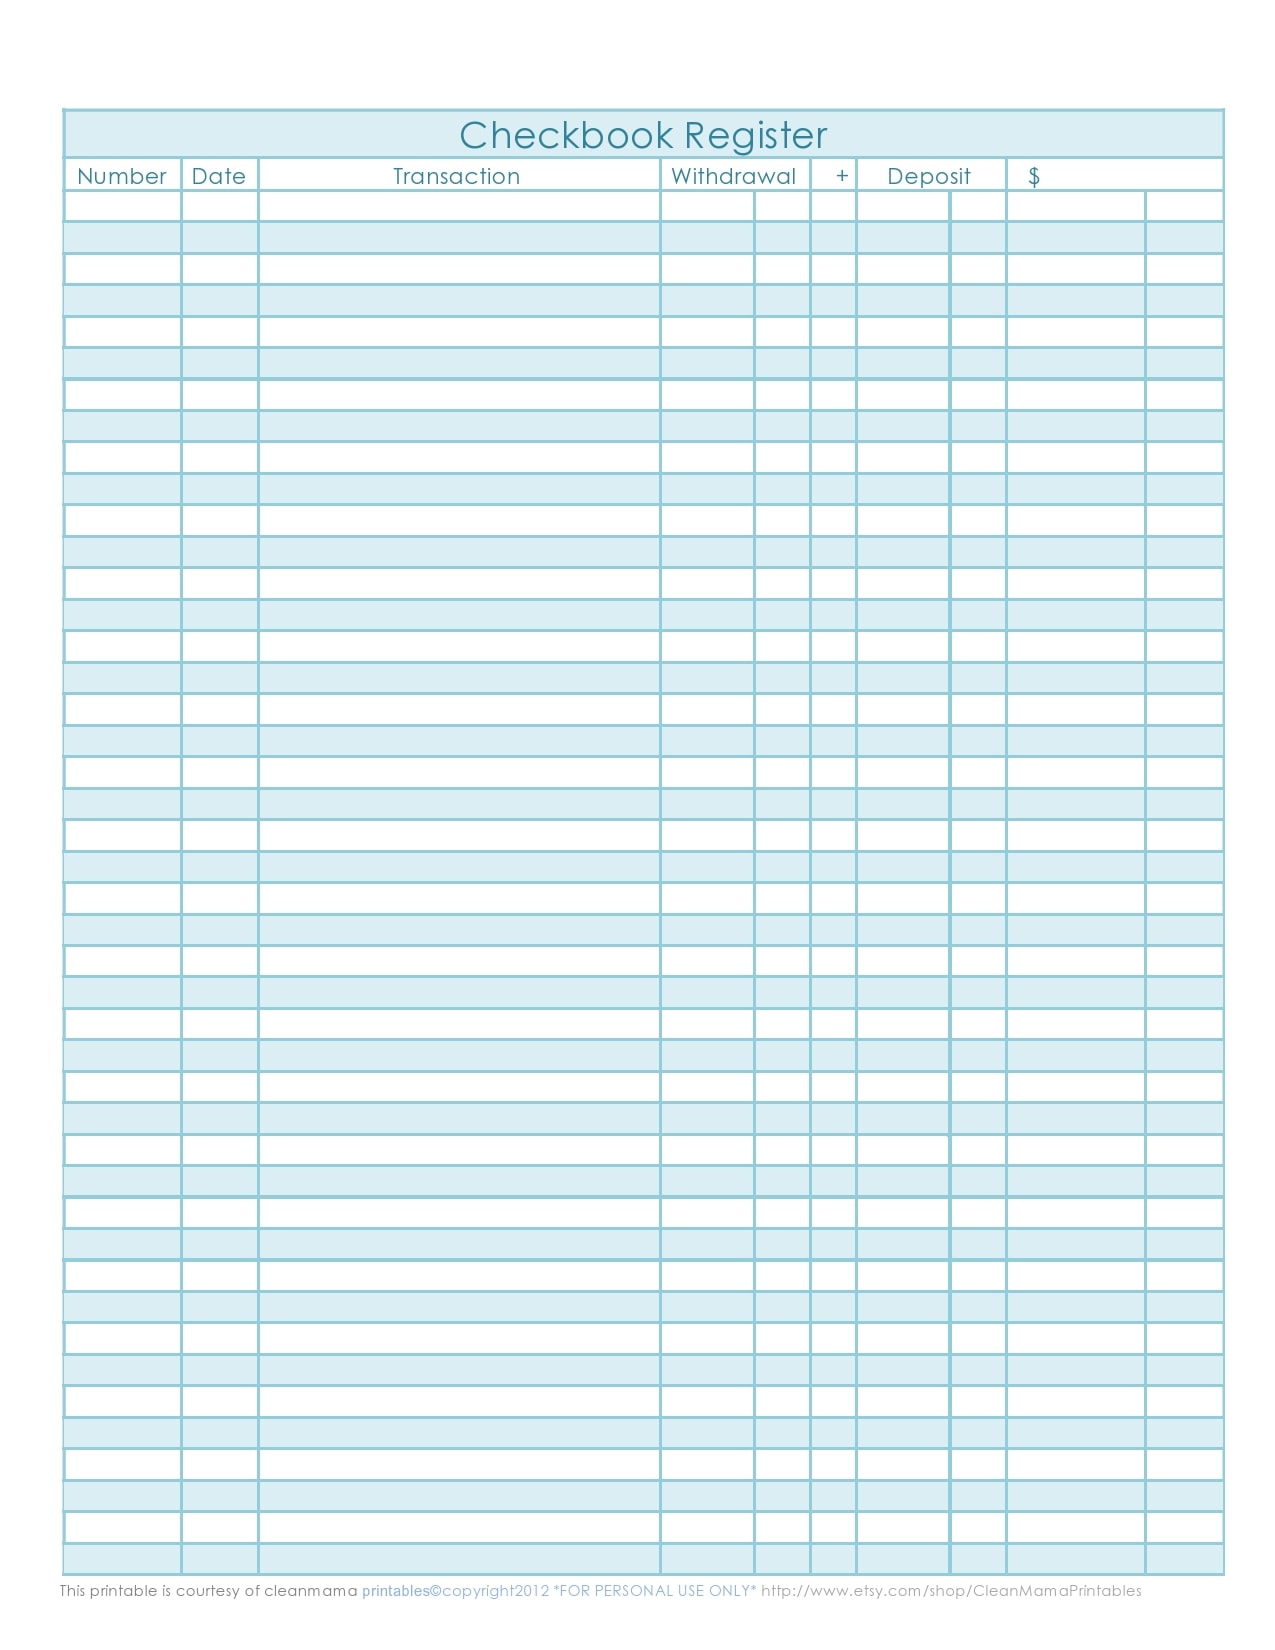
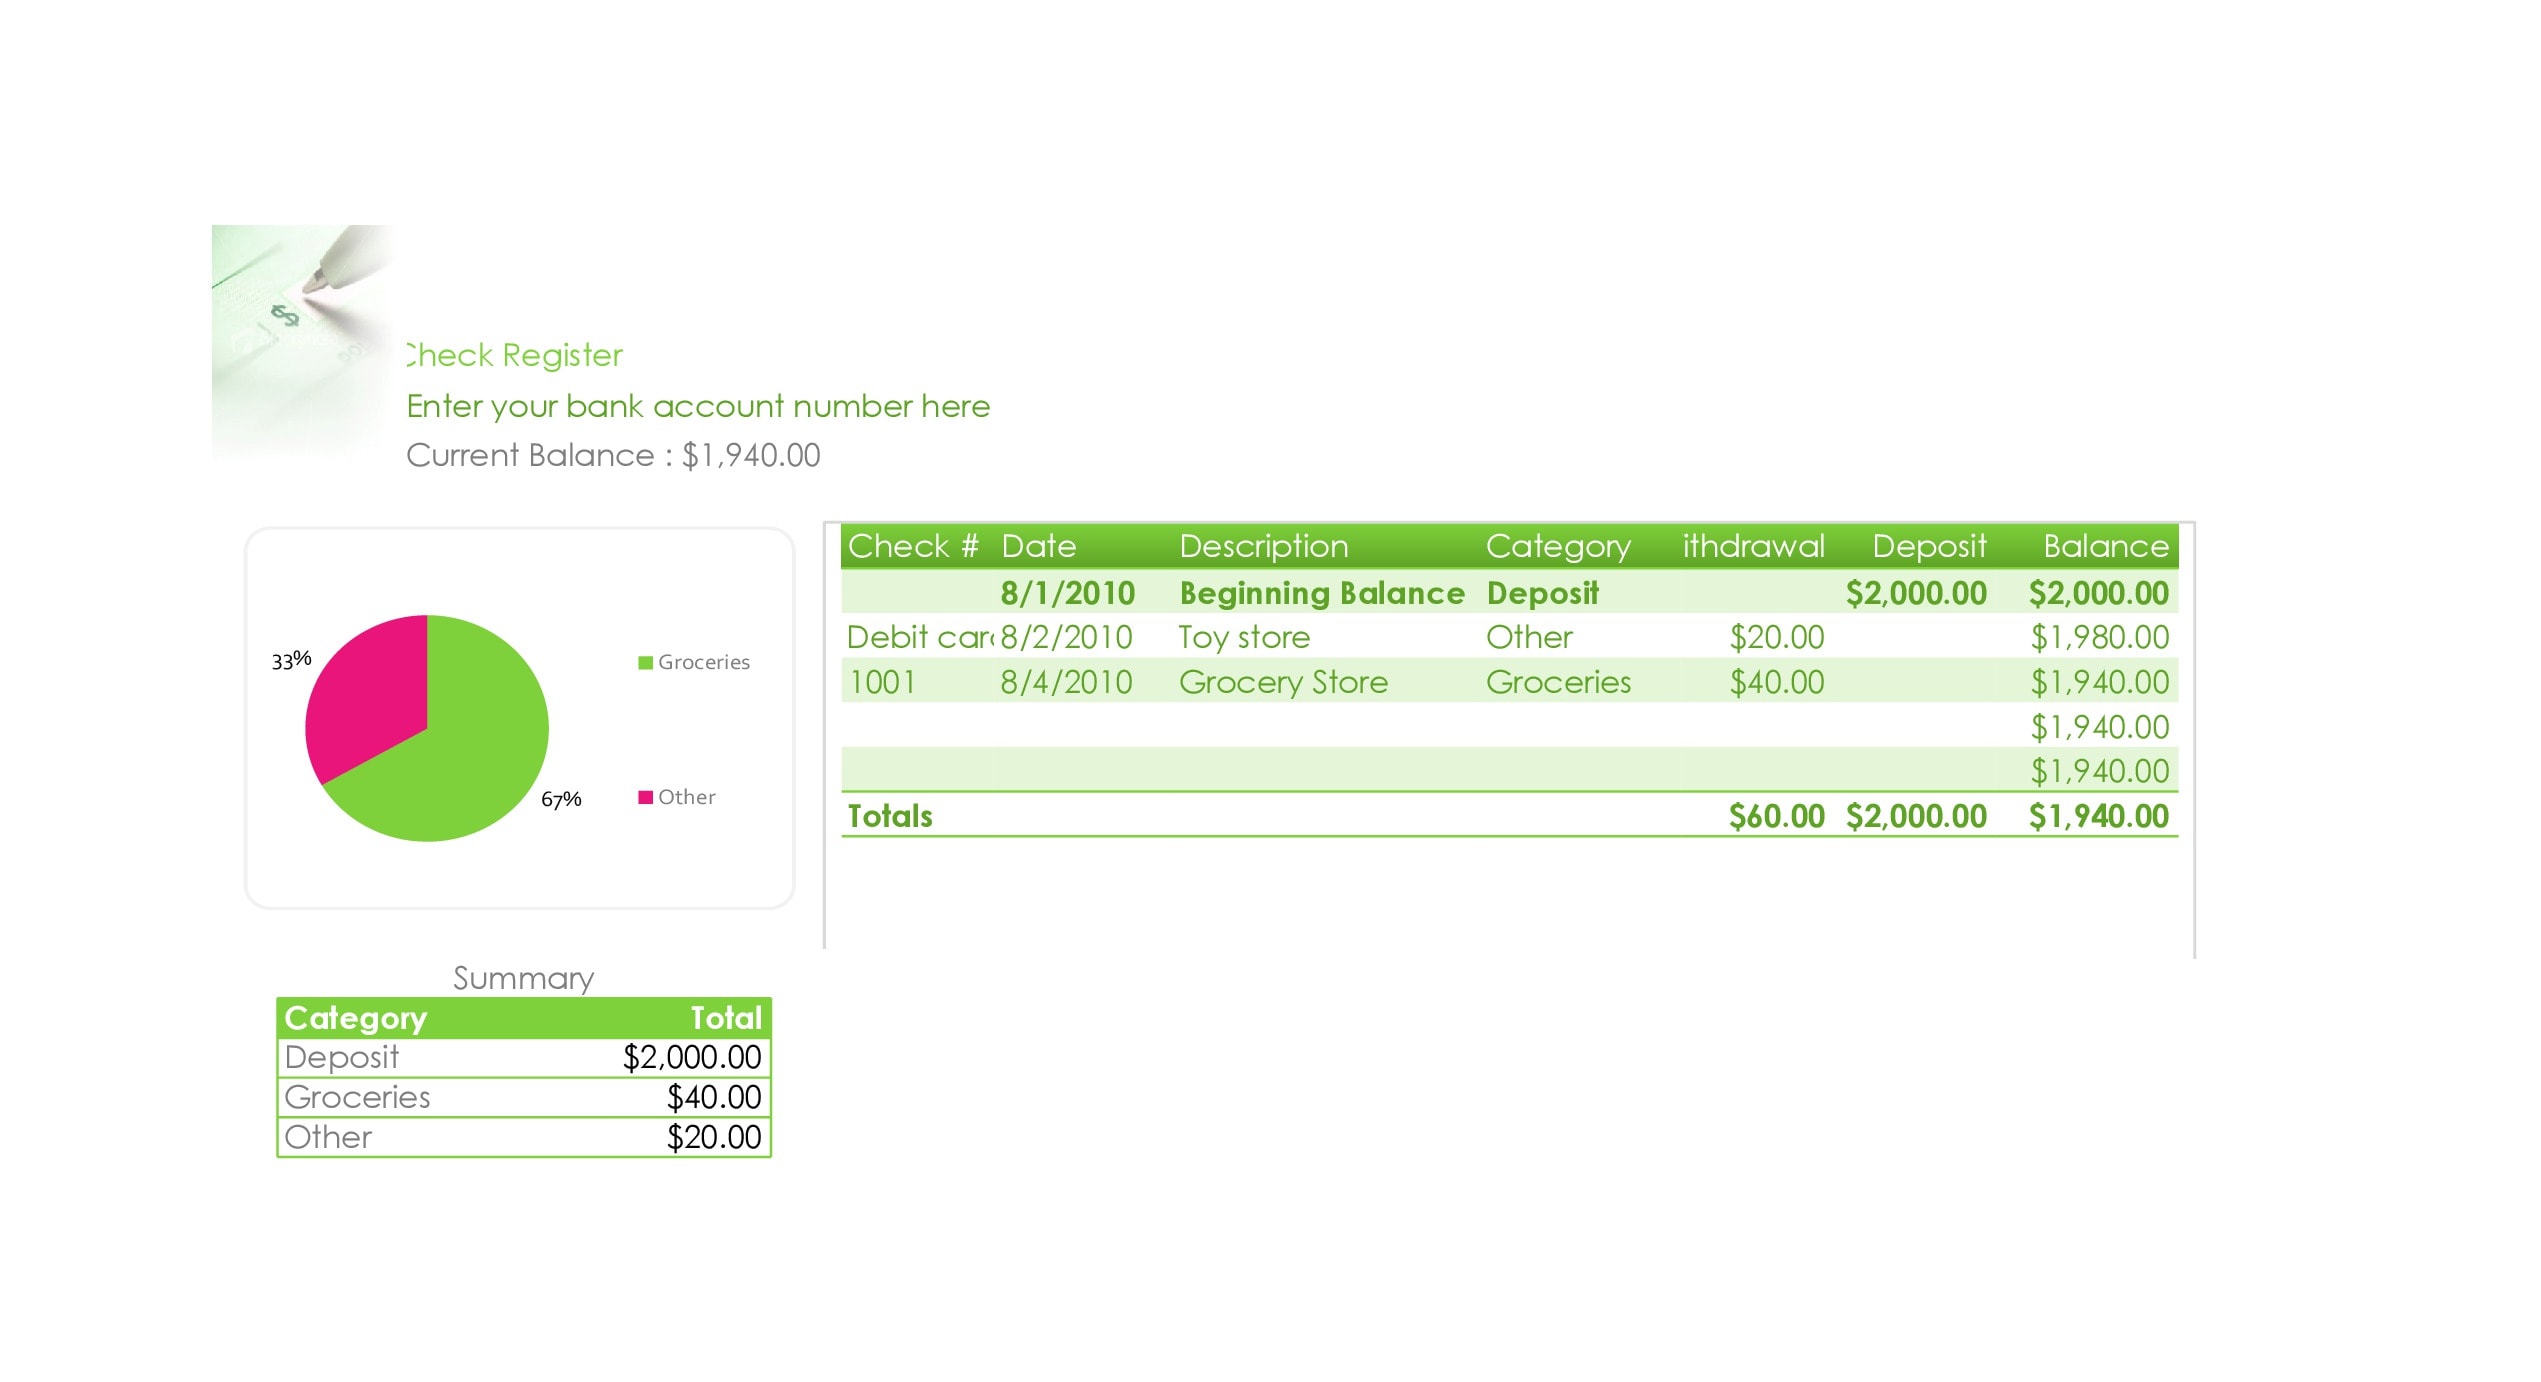
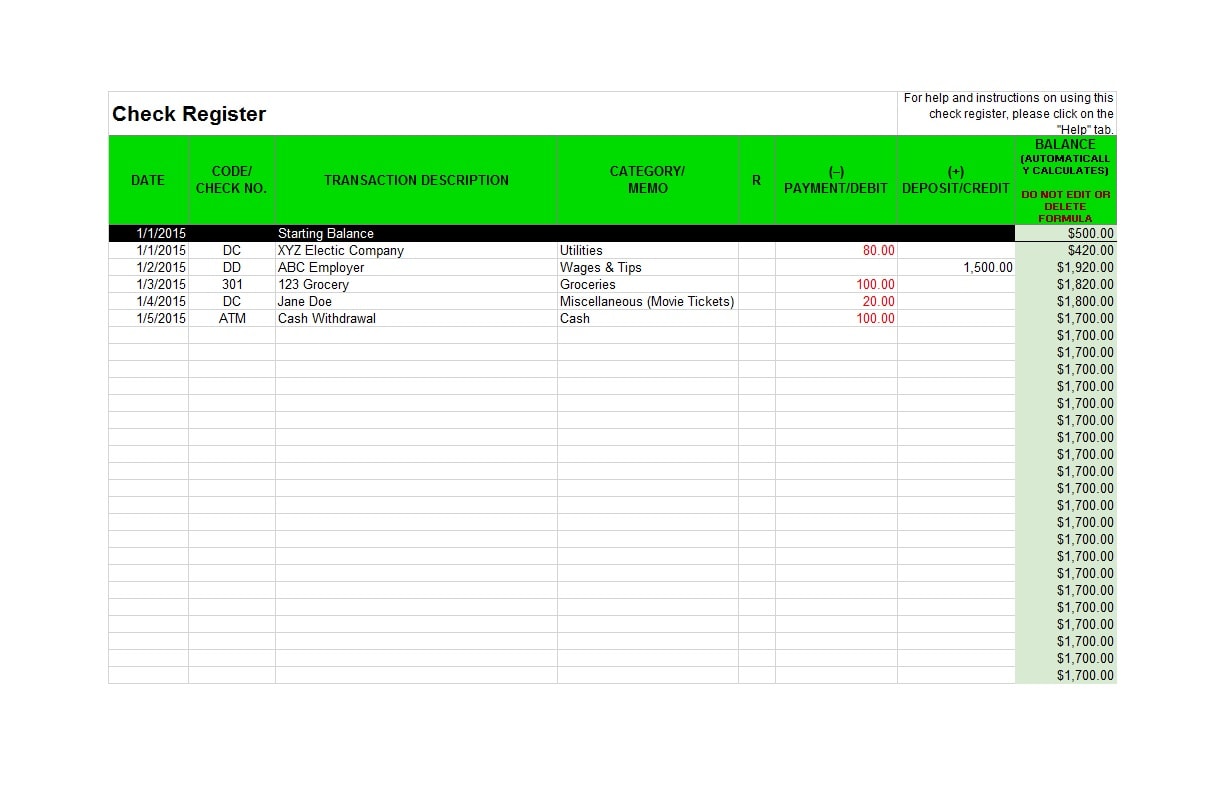
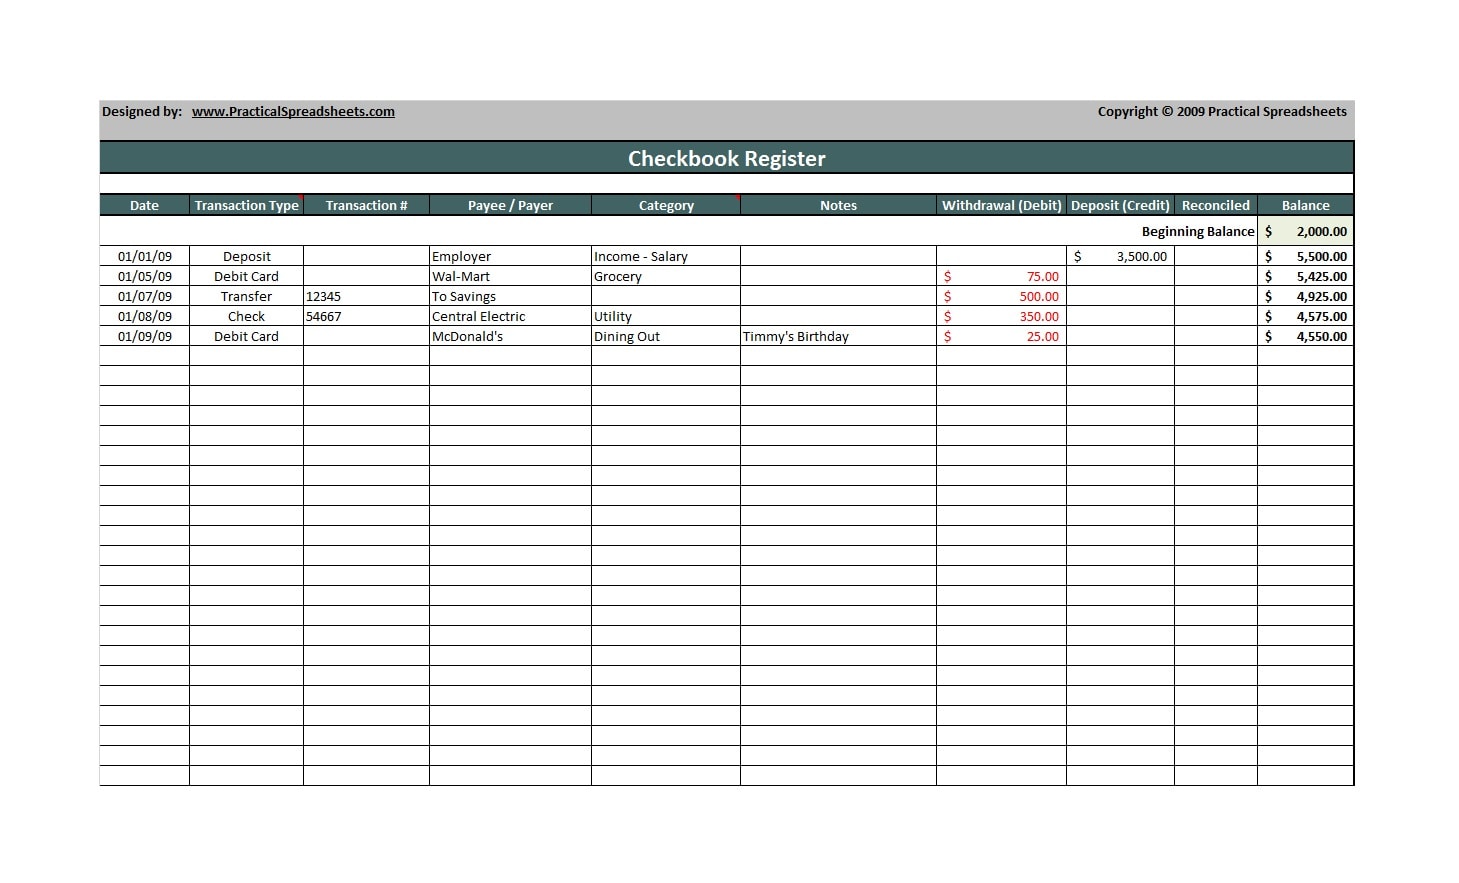
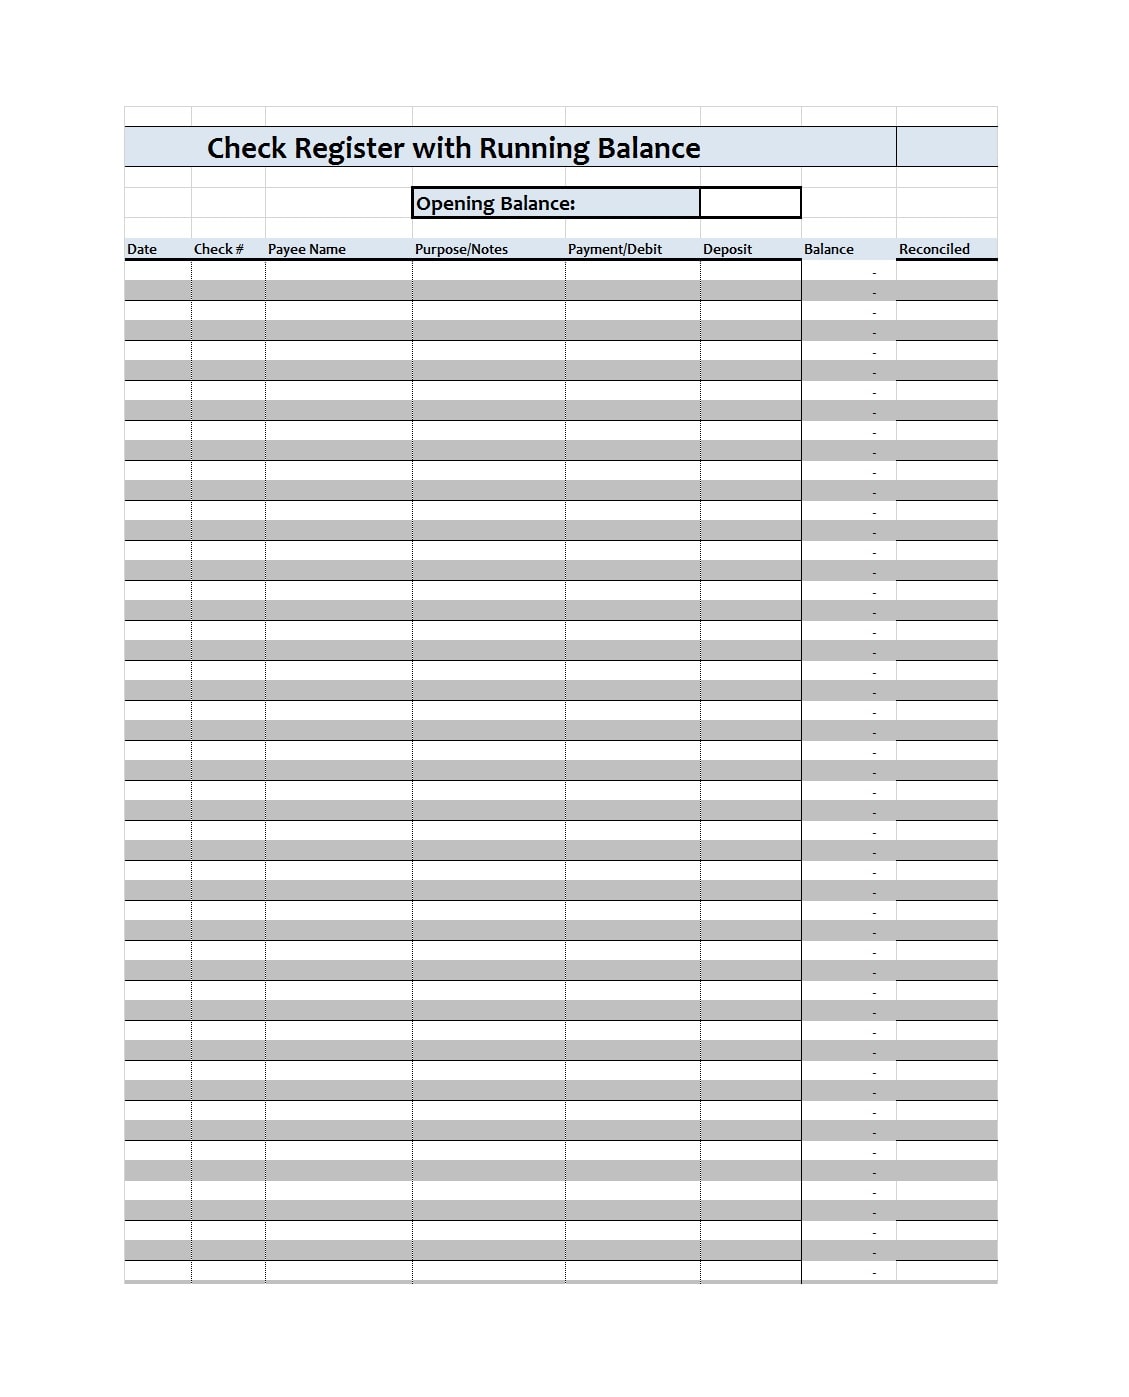
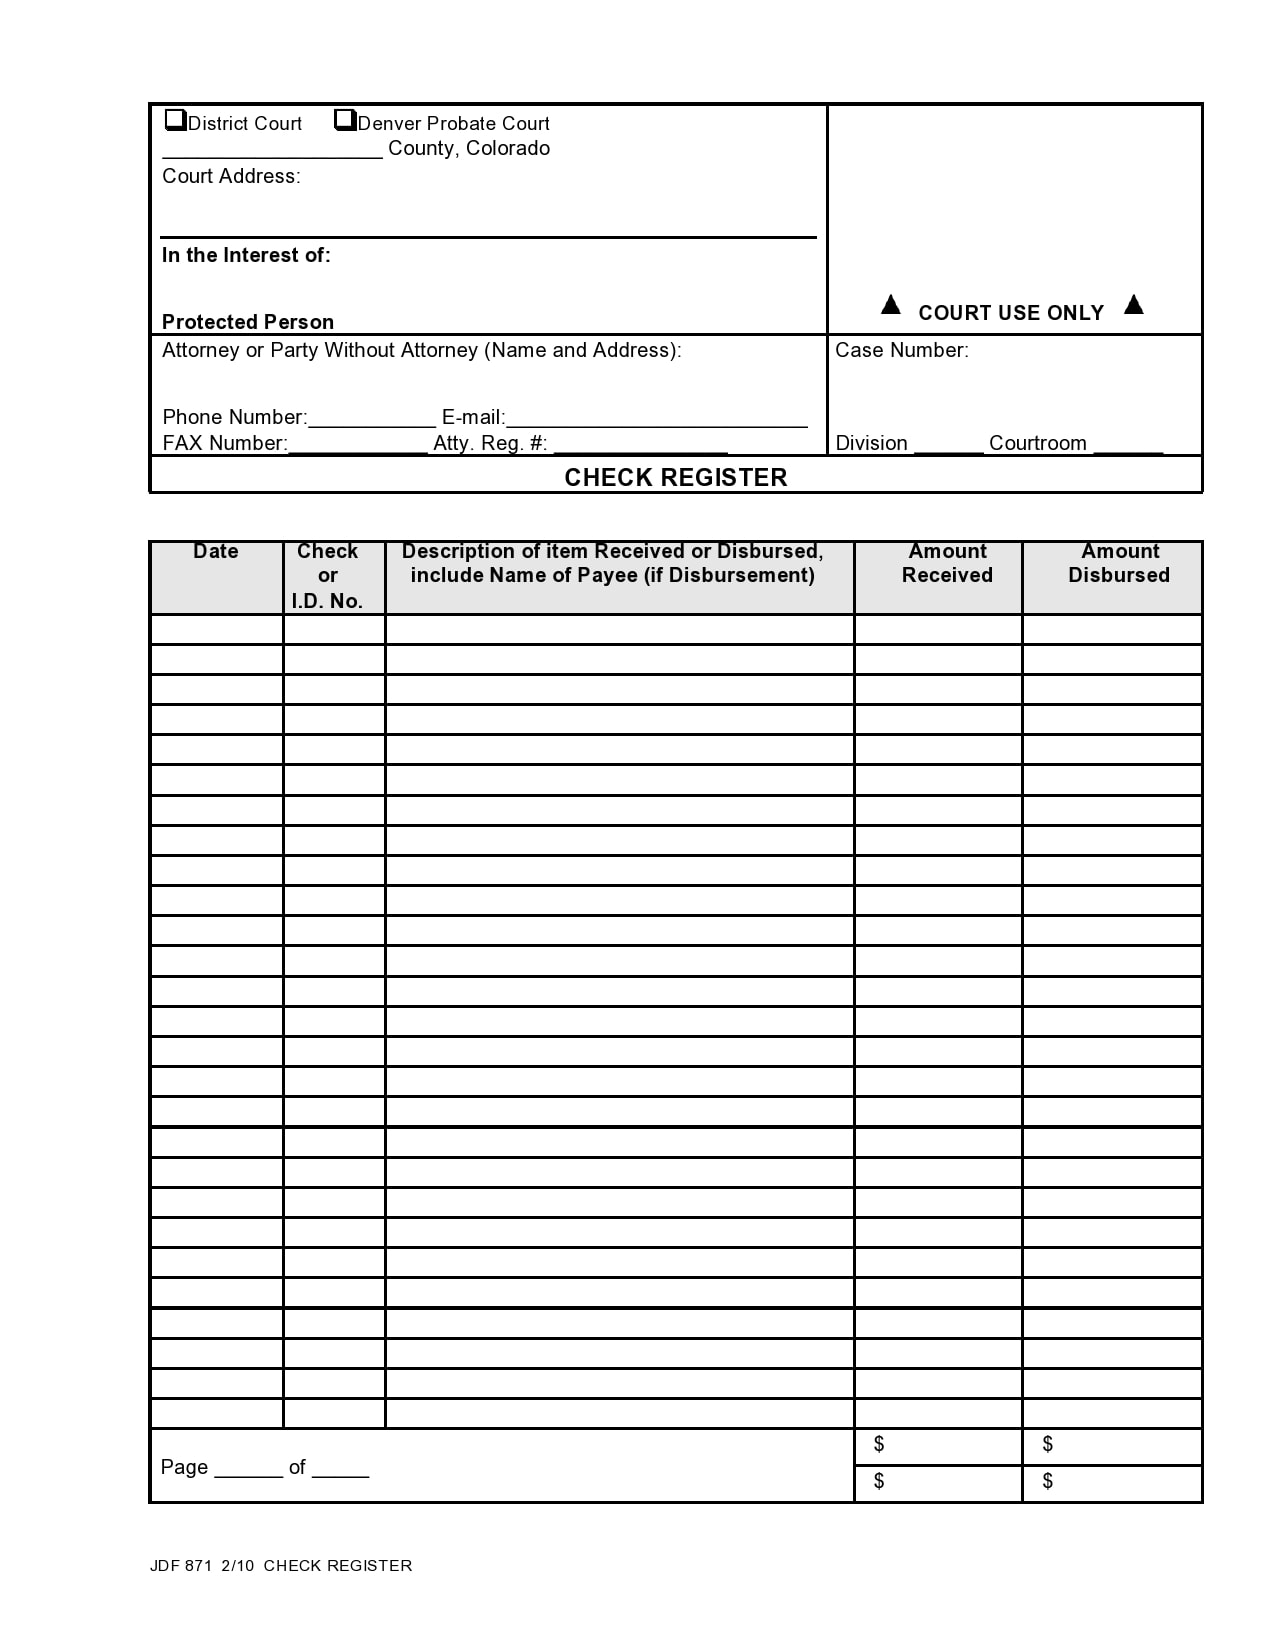
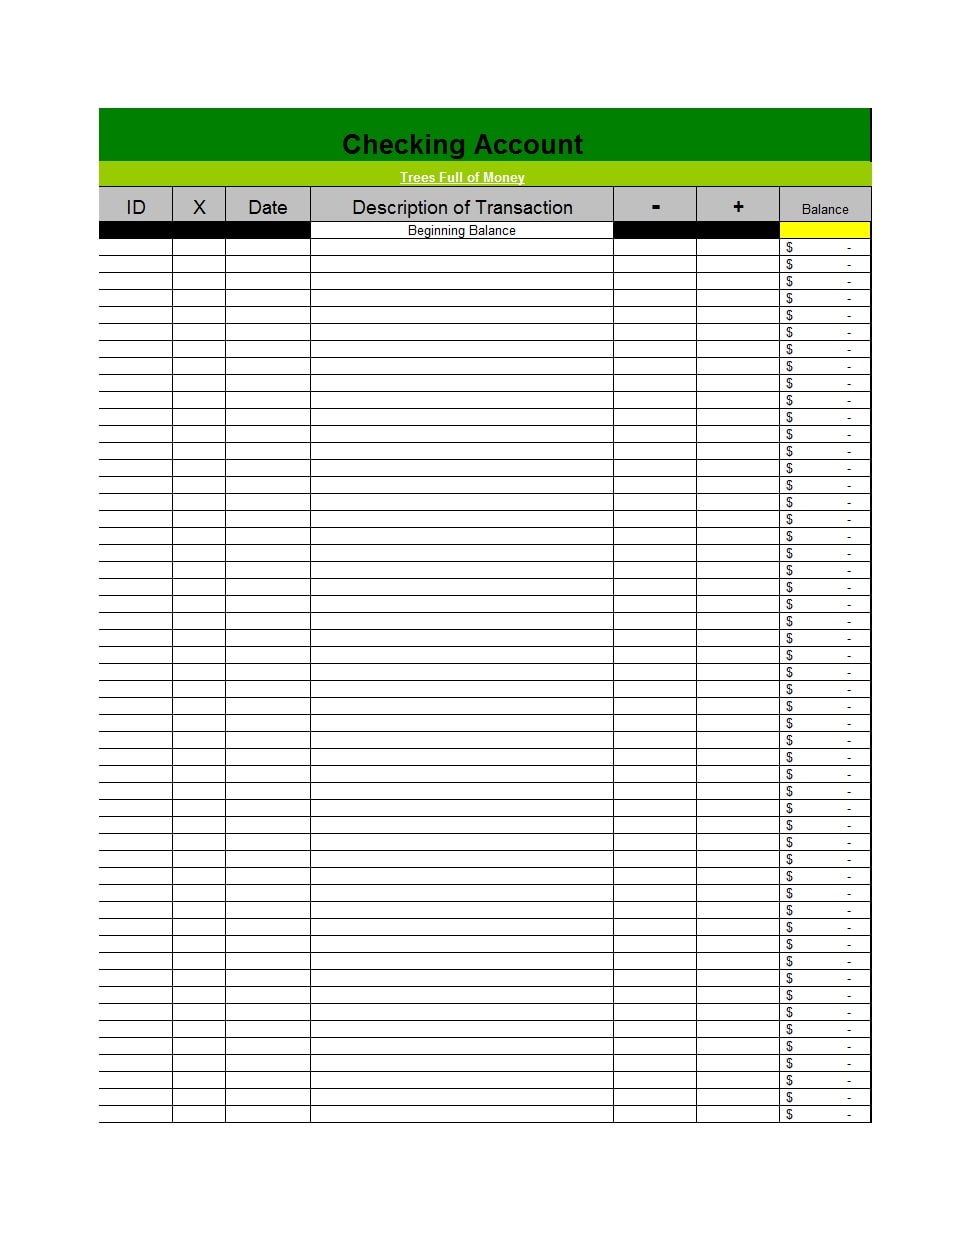
Information contained in a check register include things like:
- dates when you issued checks
- credits associated with your account
- debits associated with your account
- descriptions of the transactions
You would use a checkbook register before adding anything to your general ledger. In most cases, you might find similar descriptions found in your register and this depends on the types of transactions and the types of people you’re dealing with.
For instance, if you are a businessman dealing with plenty of retailers. In such a case, you can expect that your check register contains your name and a lot of similar descriptions. Usually, you can turn to your check register to determine your checking account balance as it contains the disbursements and all of the transactions associated with your account.
Corporate businesses can use this register to help management in the evaluation of how much cash the company used while keeping track of flows. An individual or a company can easily refer to the register when making necessary decisions as it emphasizes the actual picture of investments and expenditures.
Checkbook Registers


Why do you need this template?
If you can maintain a check register template for your business, you can have the assurance that you will always stay updated in terms of your financial status as it will give you updated information about your spending habits.
Moreover, the register also serves as a “checker” for your spending habits since you will have no choice but to see what you’re spending your money on and how much of it you have left. There can also be instances, although rare, that banks commit mistakes. With a check register, you can find these errors and have them rectified.
What to include?
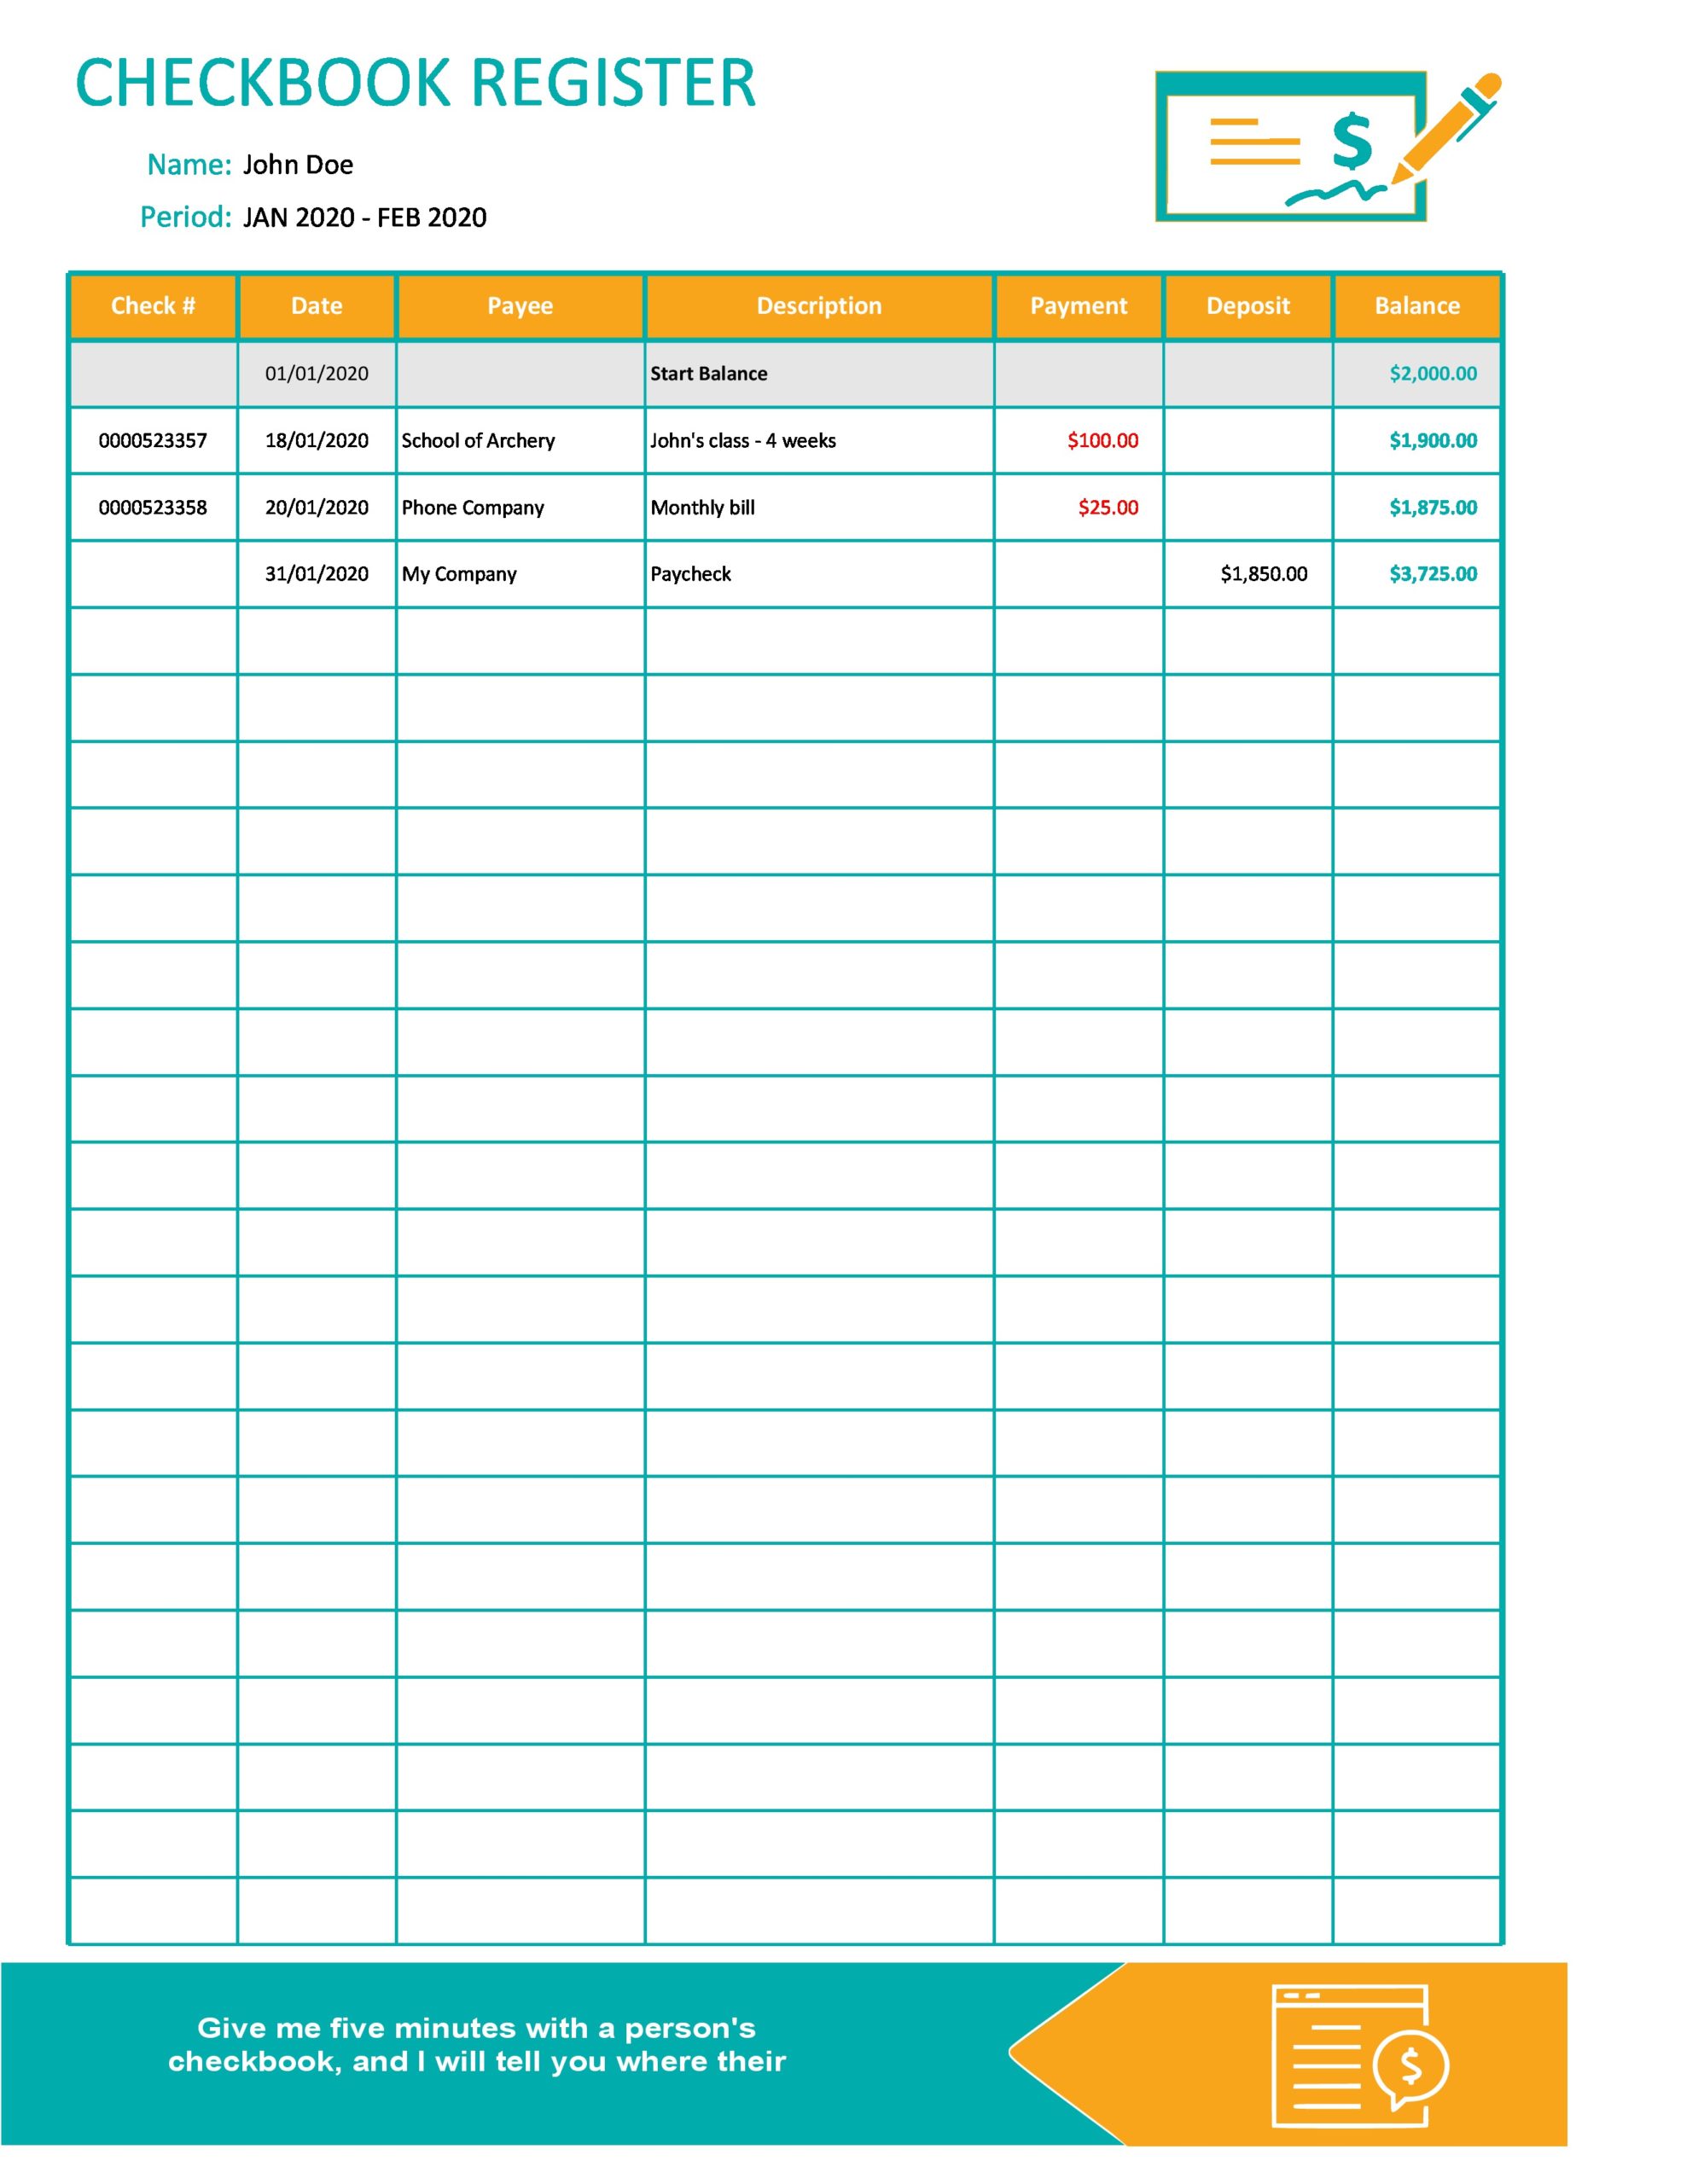
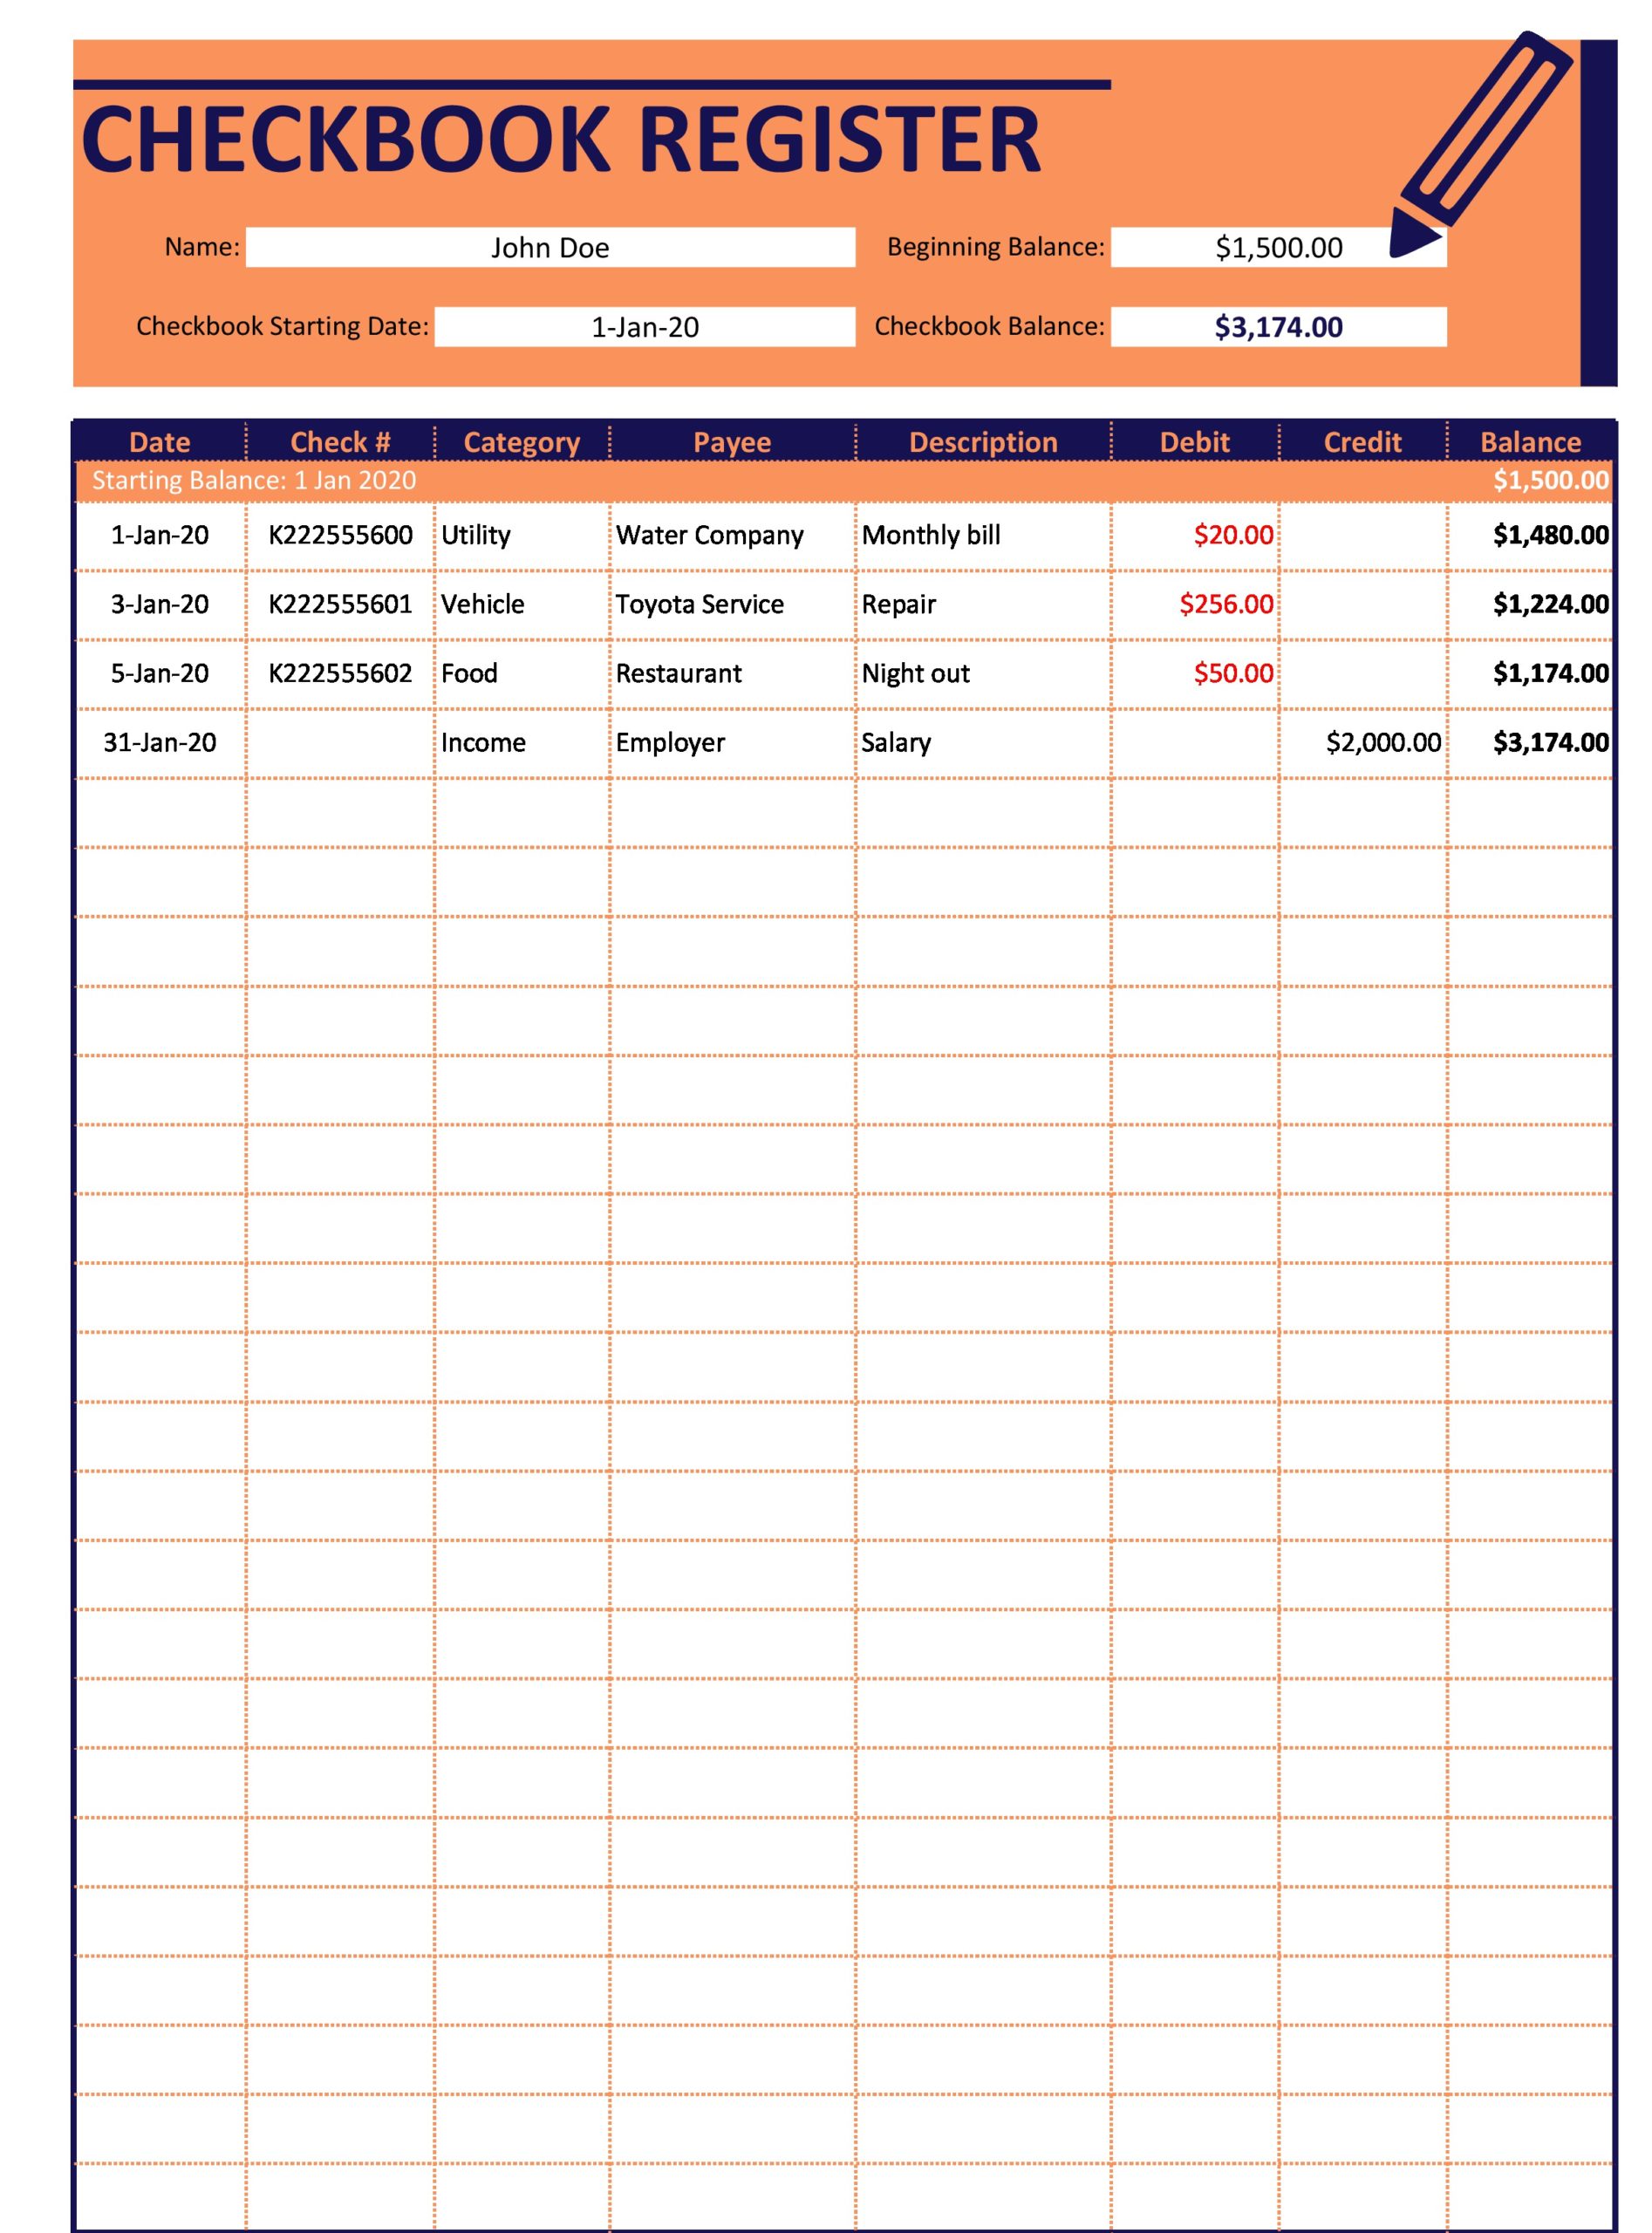
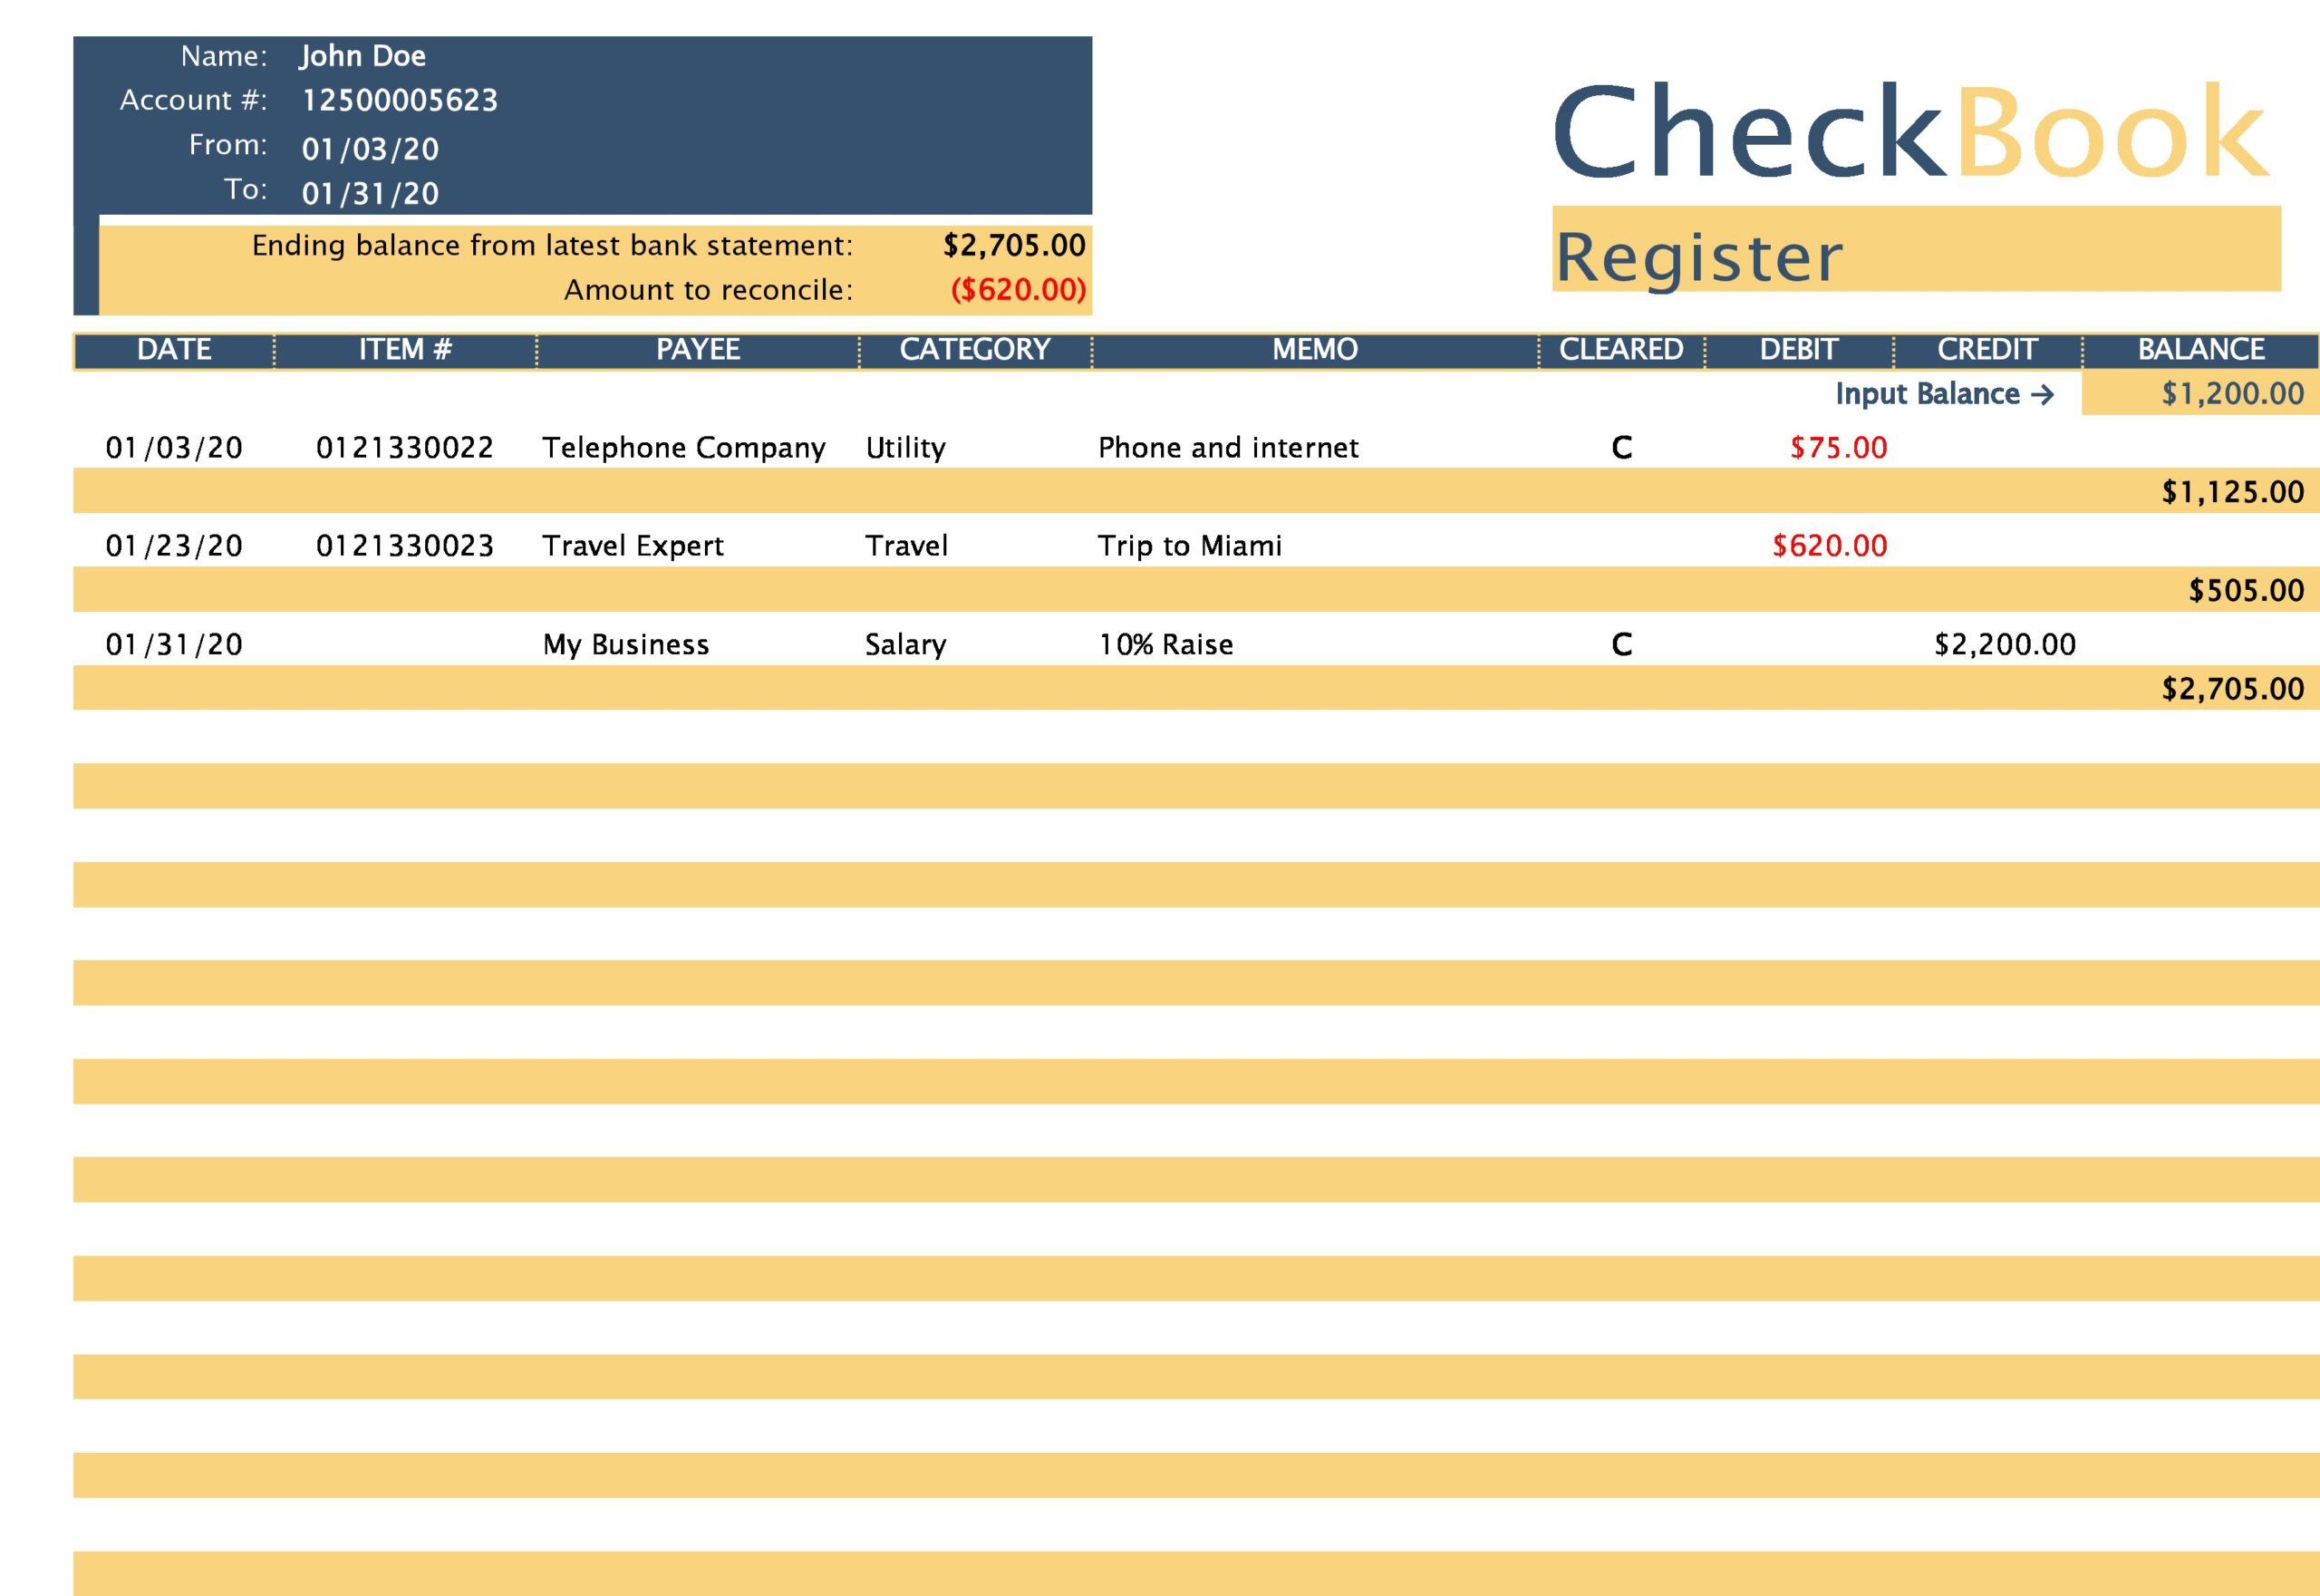
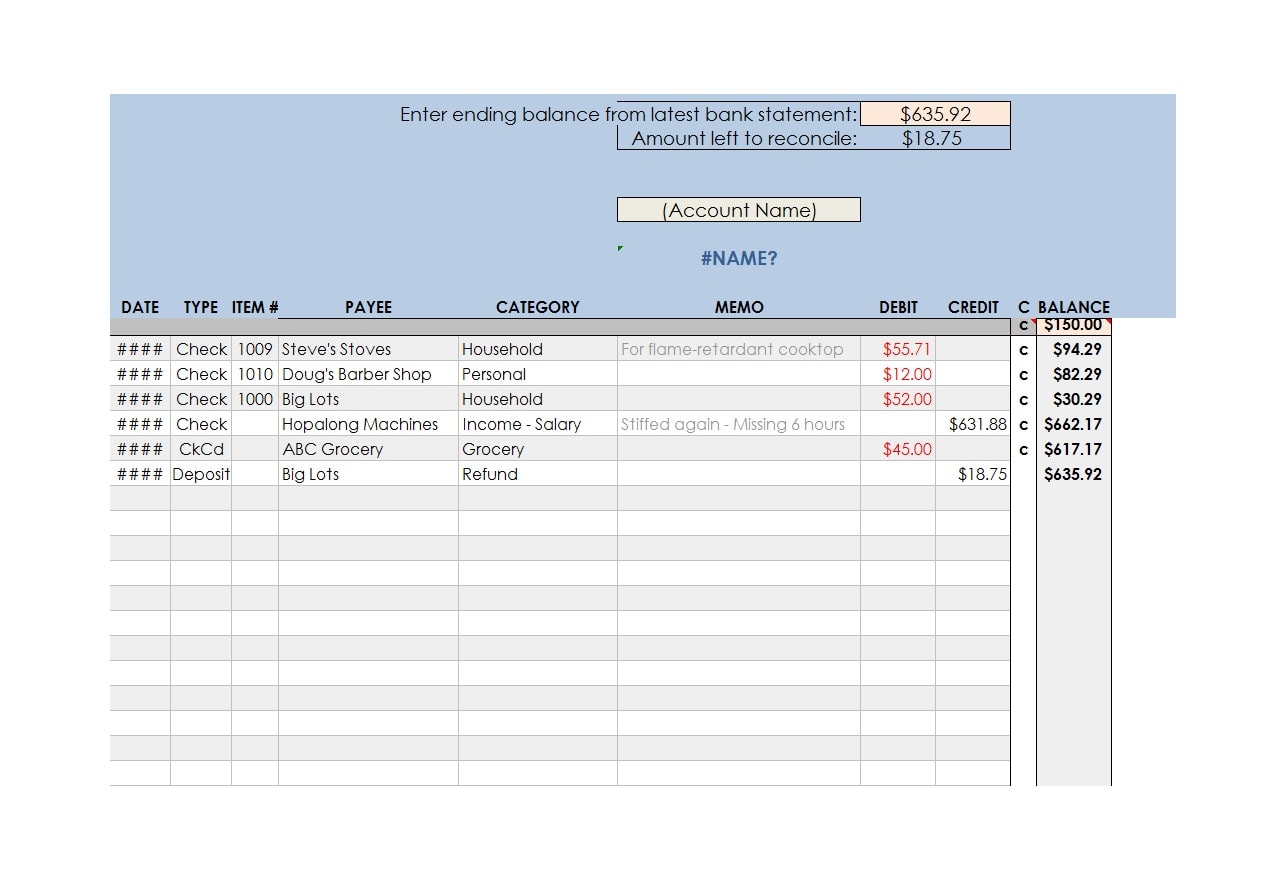
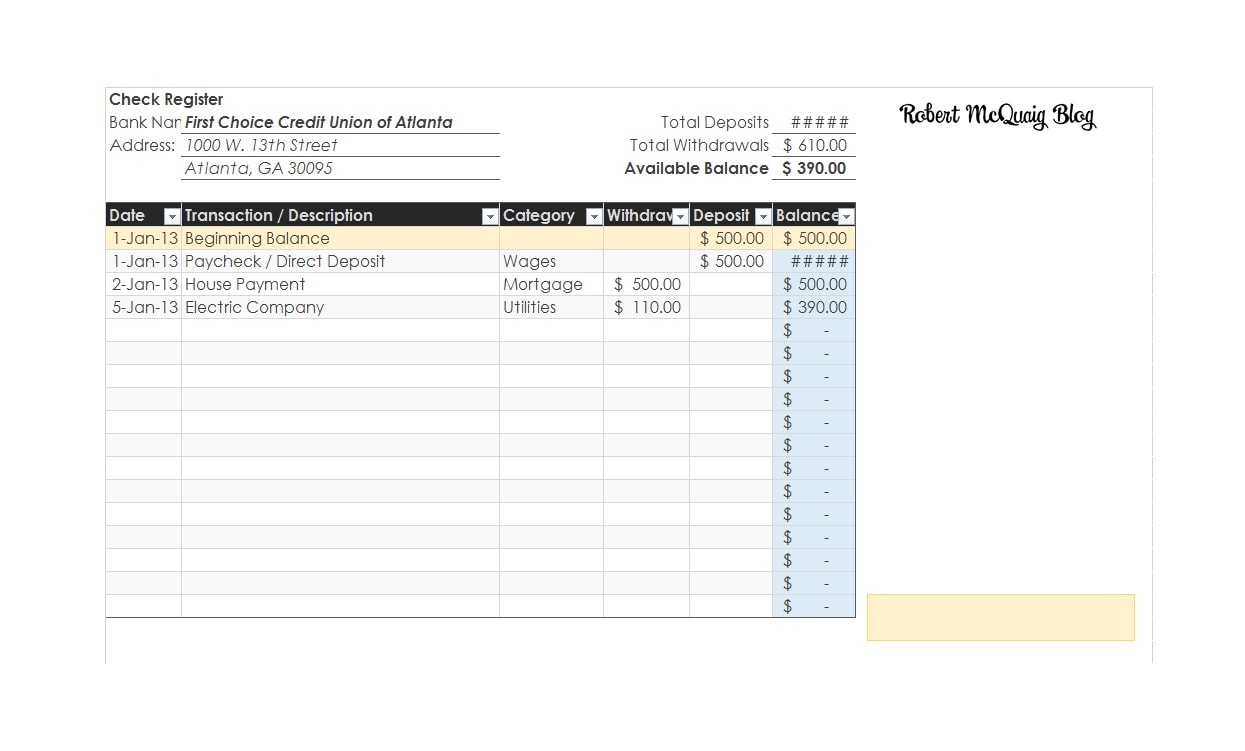
Every time you issue a check, you must record this in your check register template. Almost all registers contain similar information. Here is the information you must include in your printable check register to make it efficient:
- Check Number
Check booklets have check numbers arranged chronologically and as such, poses no harm even if an error or a mistake occurs. You can just write the number of the check in your checkbook ledger to make sure that you’re not missing any checks. - Date
This refers to the date when you issued the check. Always make sure that when you write the date, it is the correct one. Remember that the person for whom you’re writing the check for might not get the amount in the check should an error occur. - A Description of the Transaction
This determines to whom you issued the check. You can provide any name as you deem fit. In most cases, you will write the description with the recipient’s name. - Payment Amount
This refers to the amount of payment you write on your check. Make sure that you write down the exact amount in this section, whether you have made the payment using your credit card, debit card or through an online transaction. - Withdrawal Amount
This refers to the amount of money you took from your account. You must also write the exact and complete amount. - Fee Amount
This refers to the amount that you incurred because of the transaction. For example, if you withdrew money through an ATM, you will get charged a minimal fee. This charge isn’t associated with the transaction or the bank. Make sure that this charged fee amount appears in the check’s register column. - Deposit Amount
This refers to the money you deposited under your account through the check. - Transfer
If you own two or more accounts and you want to move a certain amount of money from one account to another, you must write the exact amount that you transferred to the register. - Balance
This is one of the most important parts of your register. Here, you make your balancing, based on the transactions you have made. Depending on the type of transaction, you can either subtract from or add the amount to the most recent balance to match your current balance.
Checkbook Ledger


How do I create a check register in Excel?
You can either create your own check register template or create one using an Excel spreadsheet. While versions of Excel might look slightly different, their basic functionality is basically the same. Following are the basic steps that can guide you in creating your own checkbook balance sheet:
- Launch Excel
Open a blank spreadsheet. - Create column labels
With the blank spreadsheet opened on your screen, begin by adding a couple of column labels – as many as you need. For instance, you can begin with cell B1. Here, input the word “Date” then move to the next cell on the right then input something like “Item Number.” Then continue filling in the rest of the column cells as needed. - Format the column labels
Go back to the first cell then drag your cursor all the way to the last label. Format these cells in bold to highlight them. - Resize the columns
The space allotted for each column isn’t wide enough to contain all of the information you need to input in them. For instance, a “Payee” column may include fairly long names or a “Memo” column which you use to enter notes about the transaction, should be a lot longer too. Fortunately, you can easily resize the columns in Excel to handle such situations.
First, select a column by clicking on its header. Adjust the width of the column by clicking on the edge of the header, and dragging it to widen. You can also click the Home button, Format, then choose Column Width. Continue to adjust the widths of the next columns as needed.
For one last formatting change – center of each of the labels in their respective cells. To do this, click the header of each column or row. This selects the whole column or row. Click the “Center” formatting button. This centers the labels of all the selected cells.


")